You're viewing **Apigee Edge** documentation.
[Go to the
**Apigee X** documentation](http://cloud.google.com/apigee/docs). info
Custom reports enable you to drill-down into specific API metrics and view the exact data that you want to see. From the API Monitoring dashboards, you can create a custom report with the filter and metrics preset based on the configured conditions at time of creation. In addition, a set of [default dimensions and metrics](https://docs.apigee.com/api-monitoring/custom-report#default-dimension-metrics) are configured in the report for you.
> [!NOTE]
> **Note** : You must be an **organization administrator** to create a custom report.
## Create a custom report based on your context
Quickly create custom reports based on your context as summarized in the following table. On the [Custom Reports](https://docs.apigee.com/api-platform/analytics/create-custom-reports#viewingallcustomreports) page, custom reports that are created using API Monitoring are named uniquely (by default), as indicated in the table; you can change the name when editing the custom report.
| Custom report context | Default naming convention for custom report |
|---|---|
| [Recent dashboard](https://docs.apigee.com/api-monitoring/recent#custom-report) | `API Monitoring Recent Generated` |
| [Timeline dashboard](https://docs.apigee.com/api-monitoring/timeline#custom-report) | `API Monitoring Timeline Generated` |
| [Investigate dashboard](https://docs.apigee.com/api-monitoring/investigate#custom-report) | `API Monitoring Investigate Generated` |
| [Alert condition](https://docs.apigee.com/api-monitoring/alerts-notifications#custom-report) | `API Monitoring Generated: alert-name` |
## Default dimension and metrics
The custom report will include the dimensions and metrics listed in the following table for all API Monitoring generated reports, by default.
| Component | Defaults |
|---|---|
| Dimensions | Request URI |
| Metrics | - Total response time - Target response time - Proxy errors - Target errors |
## Edit the custom report
As mentioned in the previous section, a predefined set of API Monitoring [default dimensions and metrics](https://docs.apigee.com/api-monitoring/custom-report#default-dimension-metrics) are preconfigured in custom reports. After it is created, you can edit the custom report to add or delete metrics and dimensions, as required. For example, you might want to narrow your investigation to a particular access token, developer app, API proxy, or request ID.
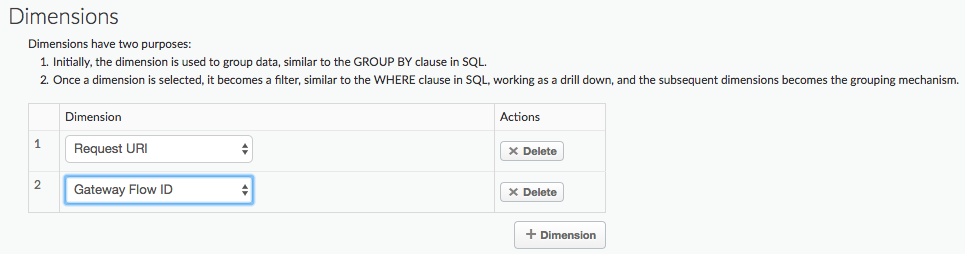
In the following custom report, you add the predefined `Gateway Flow ID` dimension, where `Gateway Flow ID` contains the unique UUID of each API request made to Edge.
Note that the report already uses the `Request URI` dimension:
The following example adds the `Client ID` dimension to the custom report.
The `Client ID` dimension contains the consumer key (API key) of the developer
making the API call, whether passed in the request as an API key or included in an OAuth token:
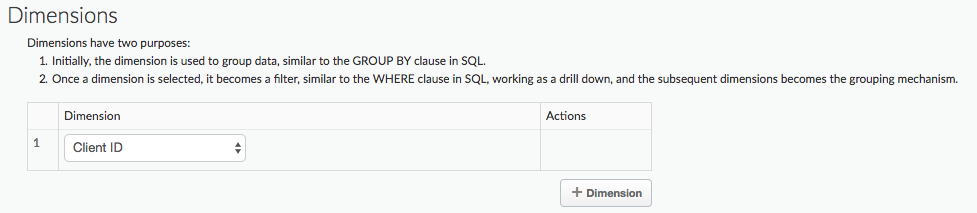
The custom report contains information for all `Client ID` values.
The next example adds a filter so you can create a custom report for a specific `Client ID`:

For more information on all predefined dimensions and metrics that you can add to a report, see [Analytics metrics, dimensions, and filters reference](https://docs.apigee.com/api-platform/analytics/analytics-reference).
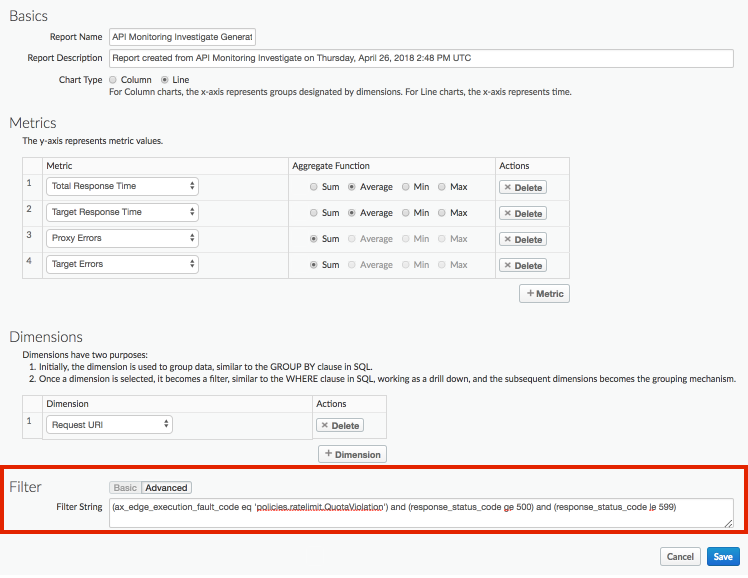
In the next example, you add a Filter to a custom report that captures the default metrics and dimensions for `policies.ratelimit.QuotaViolation` fault code and 5xx status codes:
For complete details about how to edit a custom report, see [Manage custom reports](https://docs.apigee.com/analytics-services/content/create-custom-reports).
## Example: Use custom reports to diagnose deployment issues
Attach the [StatisticsCollector policy](https://docs.apigee.com/api-platform/reference/policies/statistics-collector-policy) to your API proxies to collect custom analytics data,
such as user or product ID, price, REST action, target version, target URL, and message length.
The data can come from flow variables predefined by Apigee, request headers, query params, or custom variables that you define.
For example, requests to your API proxy include headers for the product ID, user ID, and target server version.
This request could be in the form:
```
curl -H "prodid:123456" -H "userid:98765" -H "targetversion:beta" http://myapi.com/myapi
```
You can then use the information in the headers to help diagnose runtime issues with your API proxy.
To create a custom report for these headers:
1. Add the [StatisticsCollector policy](https://docs.apigee.com/api-platform/reference/policies/statistics-collector-policy) to your API to capture the value of the custom headers:
```
0
0
alpha
```
2. Deploy your proxy and allow time for it to be accessed.
> [!NOTE]
> **NOTE**
>
> It takes about 30 minutes for a new custom dimension to be added to the database
> after the [Statistics
> Collector policy](https://docs.apigee.com/api-platform/reference/policies/statistics-collector-policy) is invoked for the first time, for each environment. For example, if a
> Statistics Collector proxy is invoked in the `test` environment, data for that custom
> dimension starts to be available in the `test` environment 30 minutes later,
> and the custom dimension will appear in the
> [custom reports](https://docs.apigee.com/api-platform/analytics/create-custom-reports) Dimensions
> drop-down list.
>
> If that Statistics Collector proxy is then called from the `prod`
> environment, it will be about 30 minutes before data for that custom dimension starts being
> available in the `prod` environment. From then on, data is available after the same
> time interval as other dimensions.
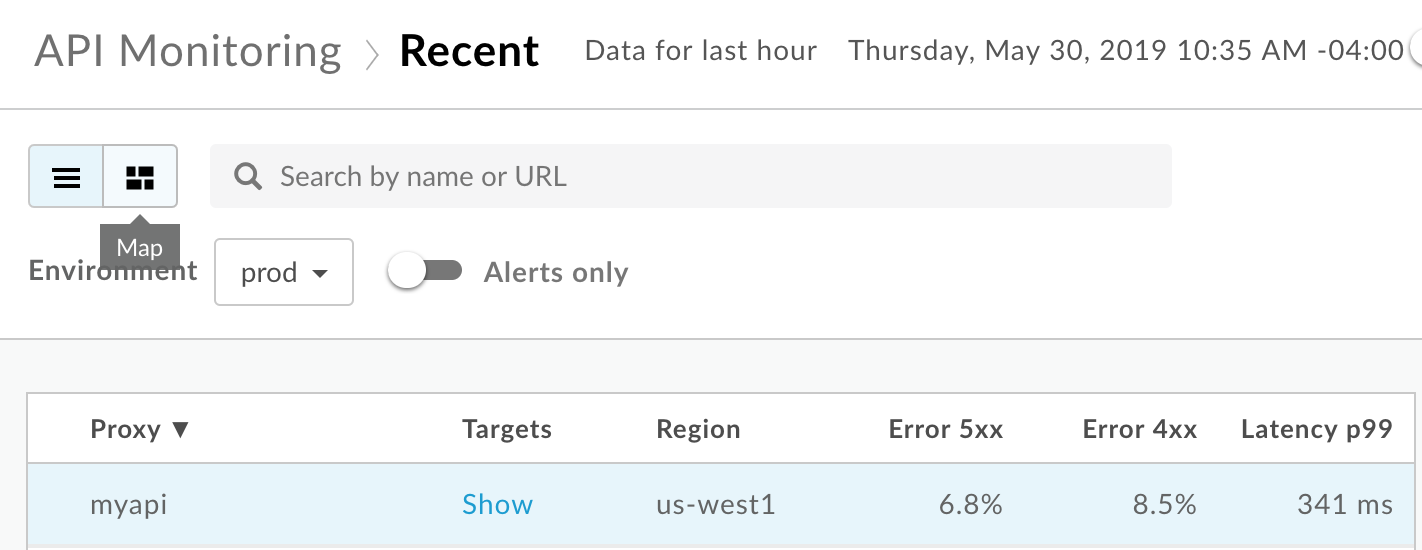
3. Click **Analyze \> API Monitoring \> Recent** in the Edge UI to view any issues with your API. Notice that you are getting 4xx and 5xx errors for the **myapi** proxy:
4. Select the **myapi** proxy row to view more details in the right pane of the Recent dashboard.
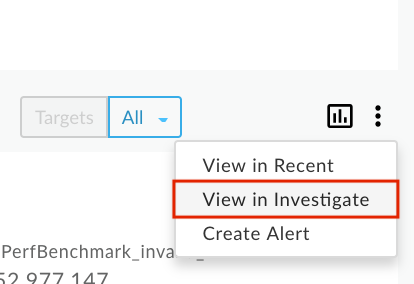
5. In the right pane of the Recent dashboard, select ** \> View in Investigate** to access the Investigate dashboard:
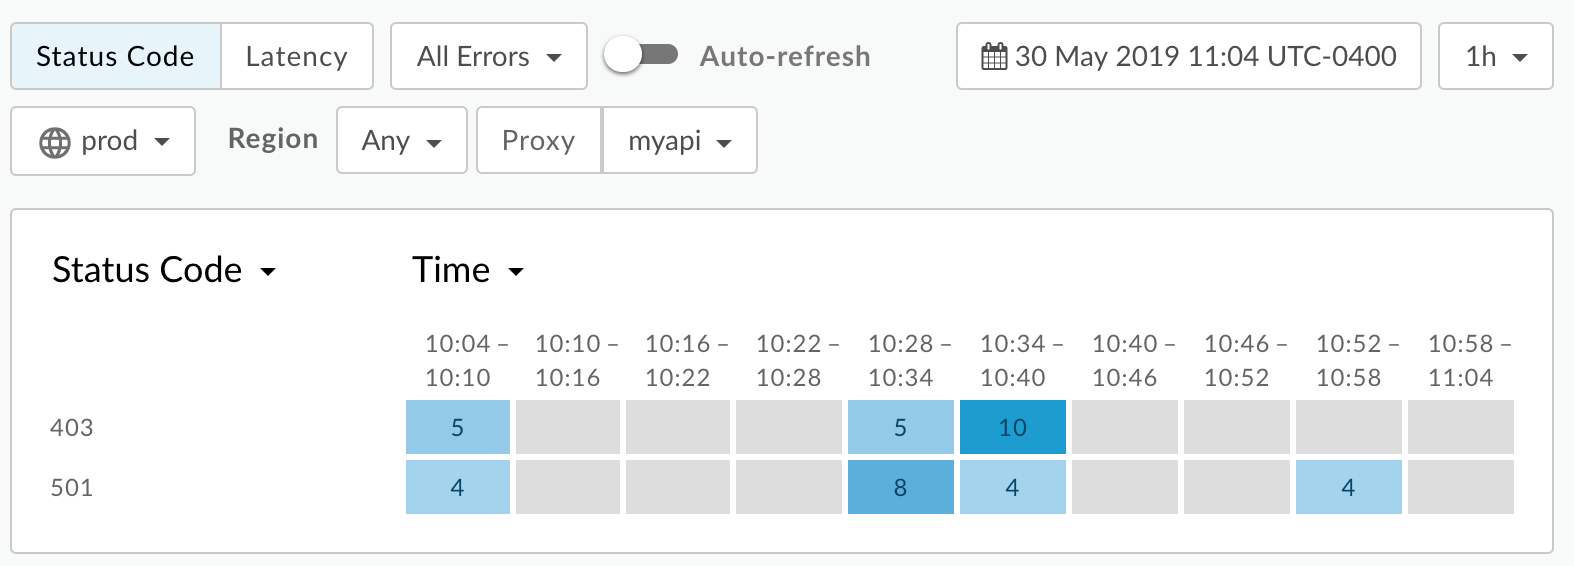
6. Filter the Investigate dashboard by the **myapi** proxy and then view the **Status Code** in the top chart. Notice that you are getting 403 and 501 errors:
7. In the Edge UI, select **Analytics \> Custom Reports \> Reports** to create a custom report that includes the values of these custom metrics as a Dimension.
> [!NOTE]
> **Note** : You can also create a custom report directly from the **Recent** , **Timeline** , and **Investigate** dashboards. However, by default those reports will not include your custom analytics data but you can add them.
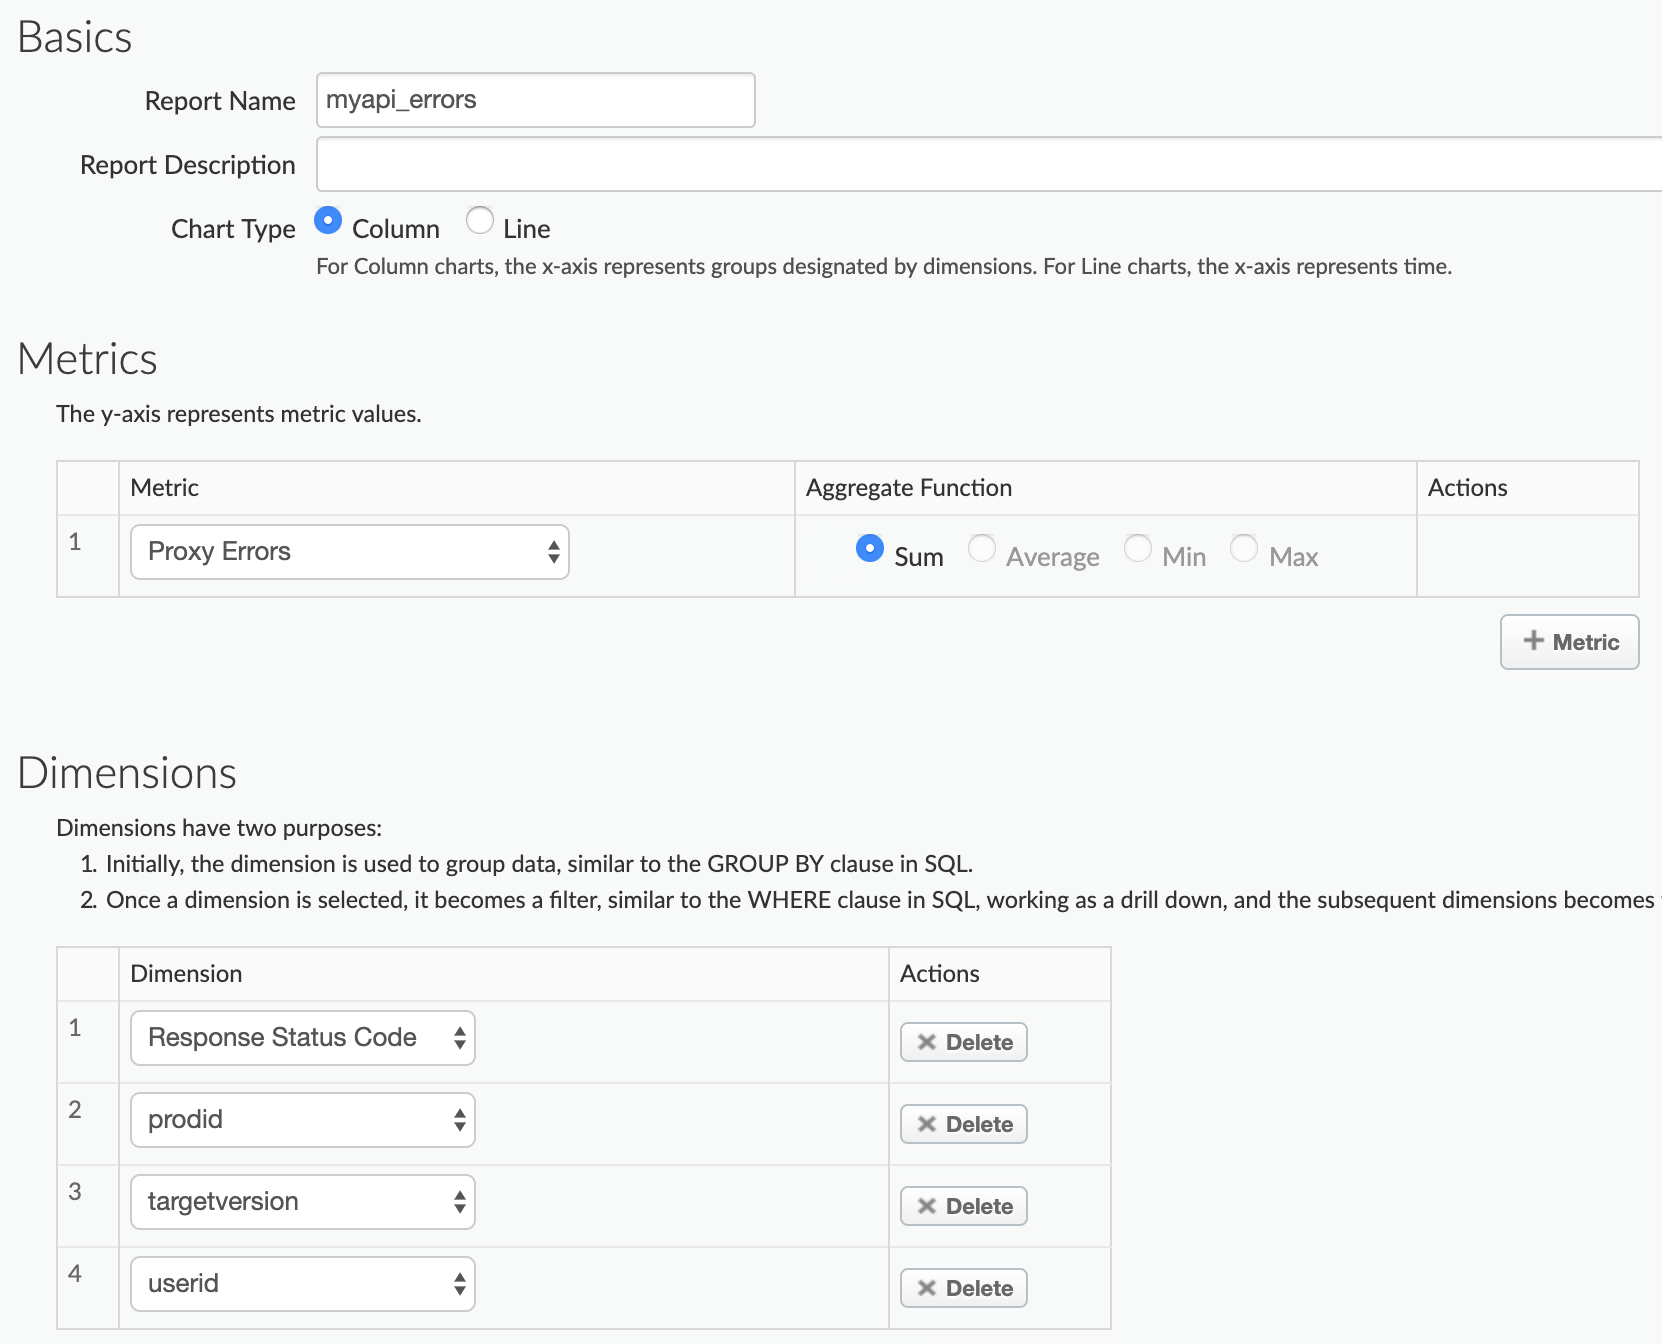
8. Select **+ Custom Report** to create a custom report named **myapi_errors**.
9. Select **Proxy Errors** for the Metric, and set the **Aggregate Function** to the **Sum**. You can add more metrics if you desire.
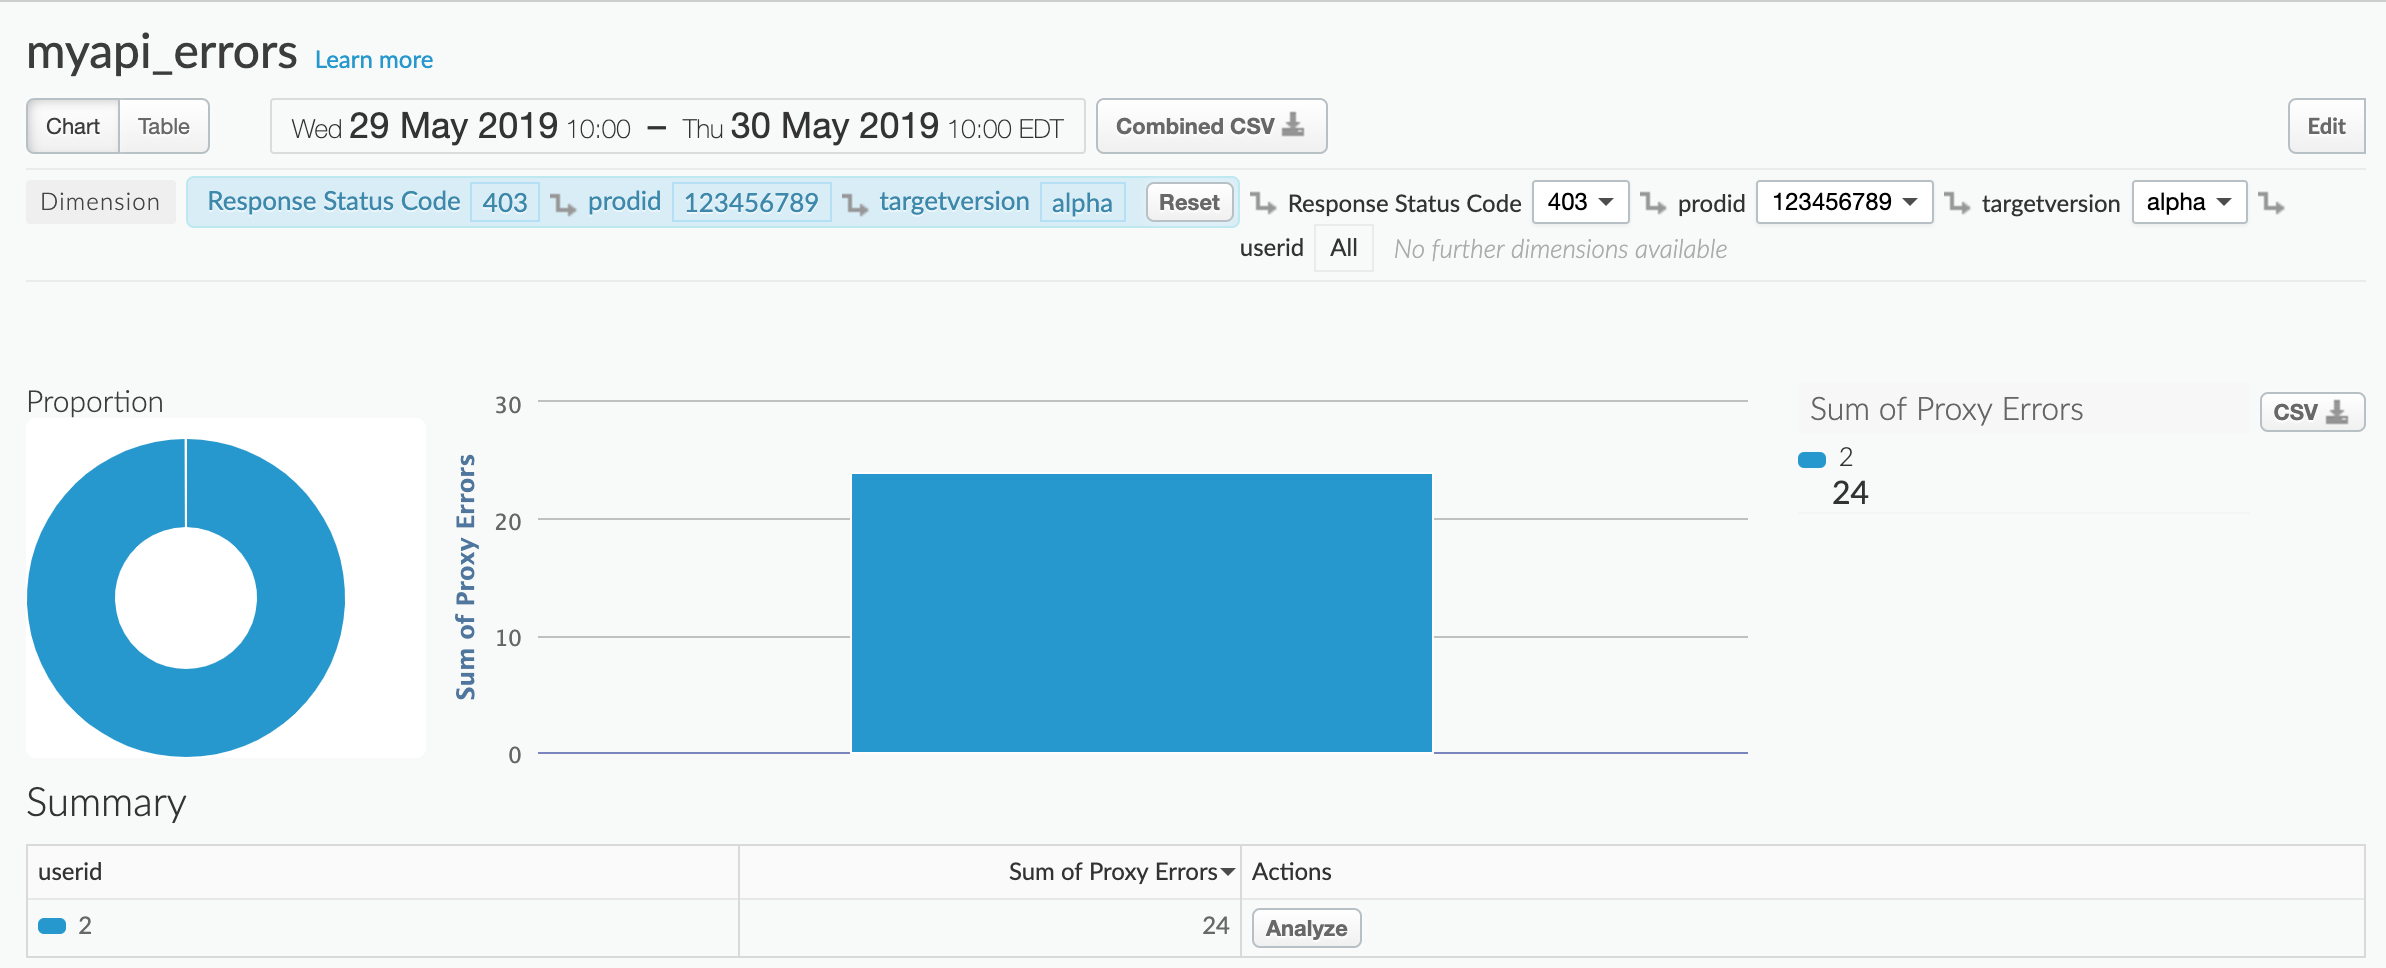
10. Select the predefined **Response Status Code** Dimension, and then add the three custom statistics **prodid** , **targetersion** , and **userid** to Dimensions:
11. Set the Filter to include only data for the **myapi** API proxy `(apiproxy eq 'myapi')`:

12. Save the report.
13. Run the report for the previous 24 hours. When the report first opens, you see a chart of HTTP 403 and 501 errors:
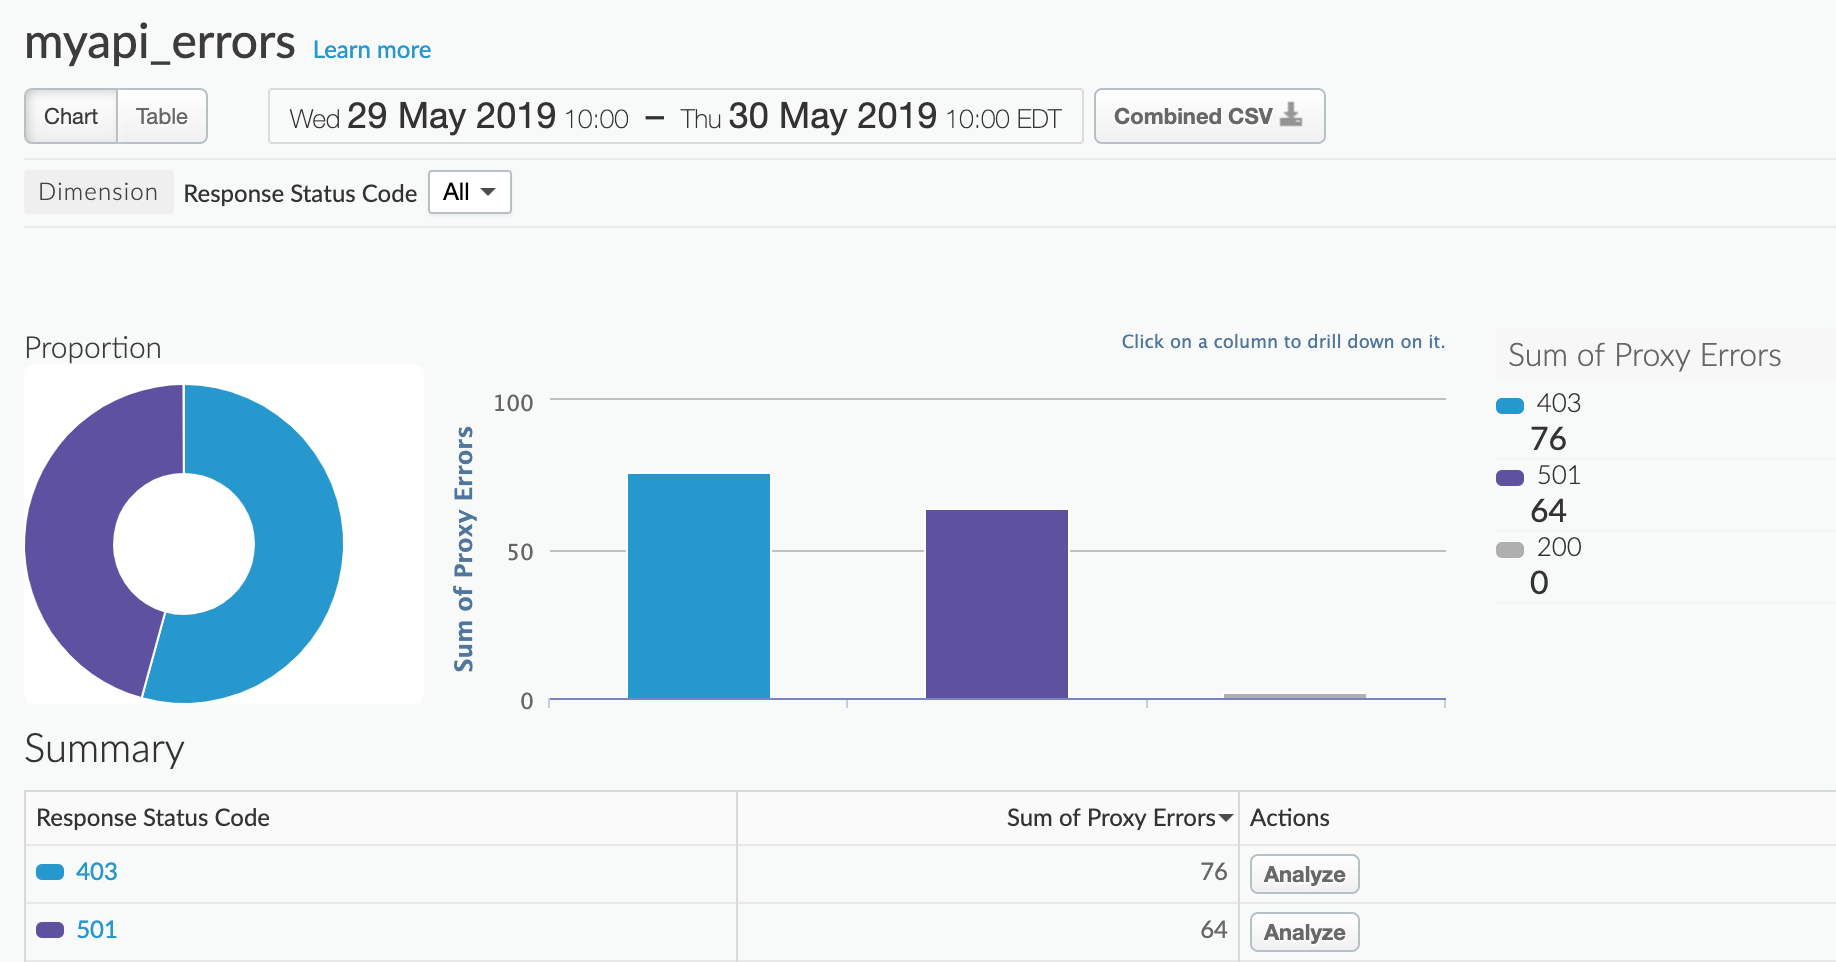
14. Under **Summary** , click either **403** or **510** to see which product is generating the errors. For example, you select **403**:
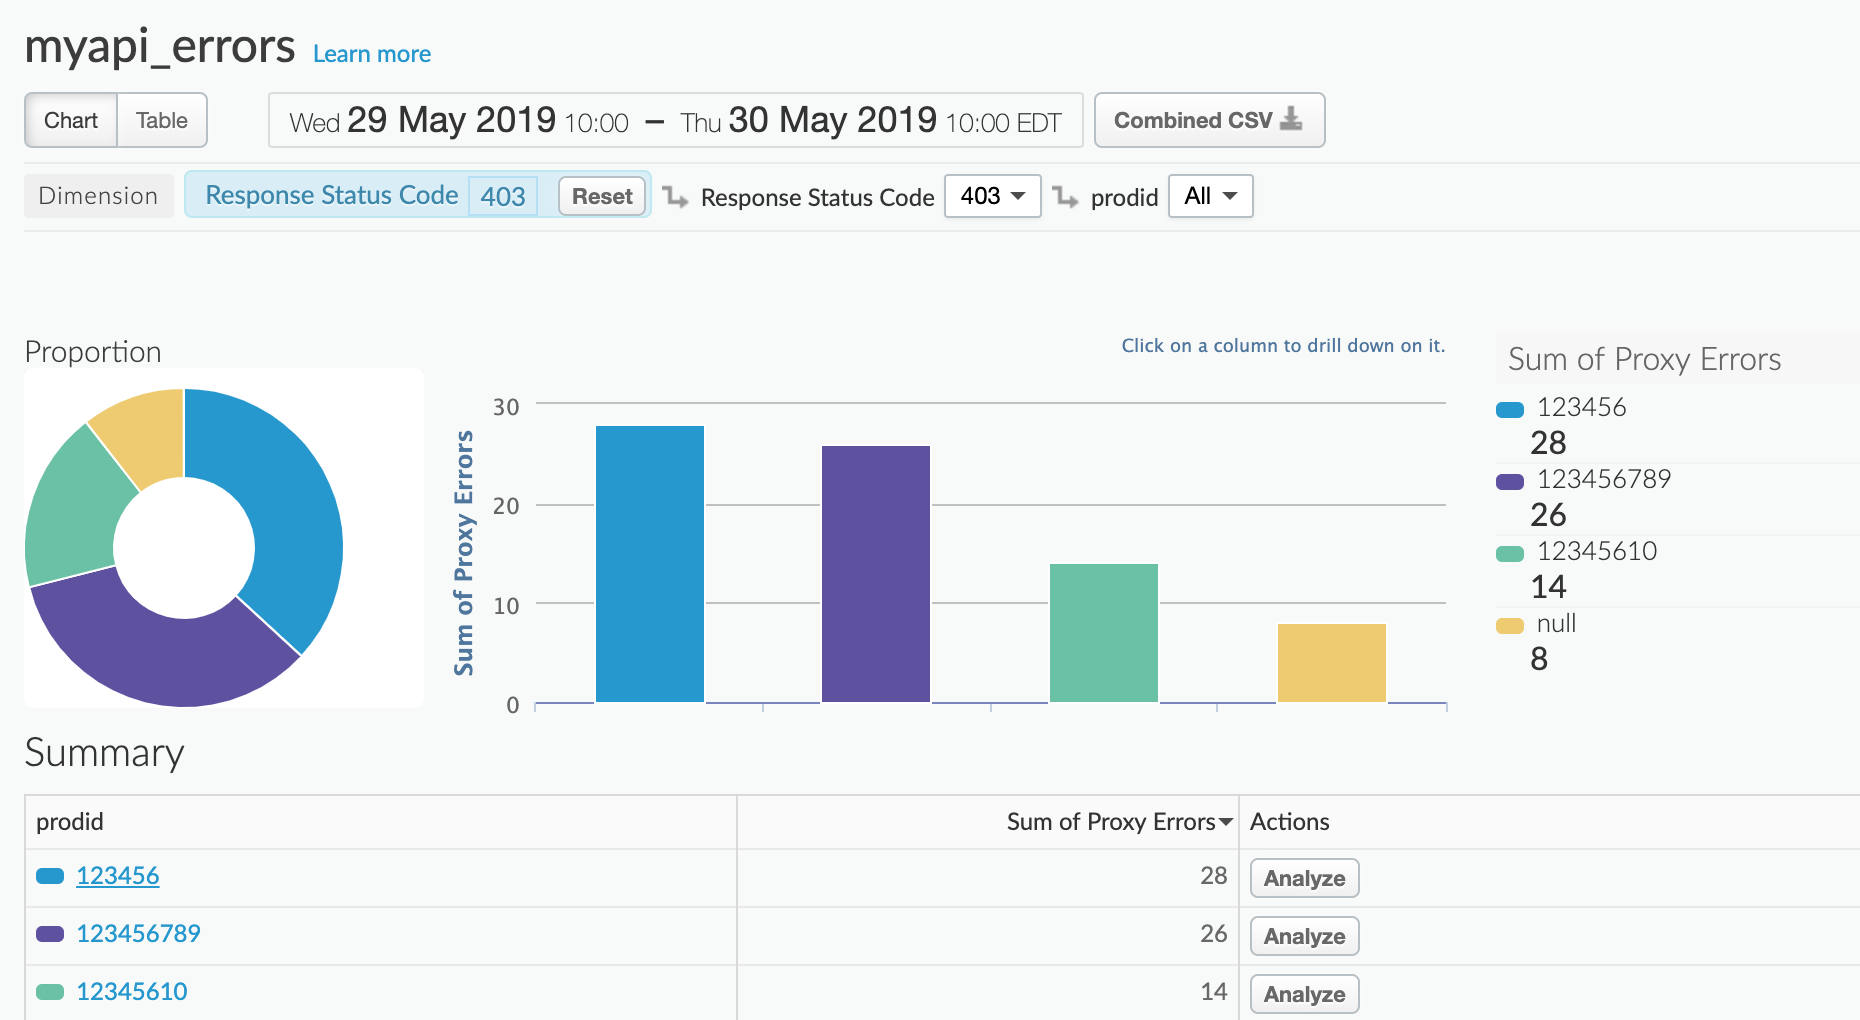
15. Click a product id under **Summary** to see the errors by target version (alpha or beta):
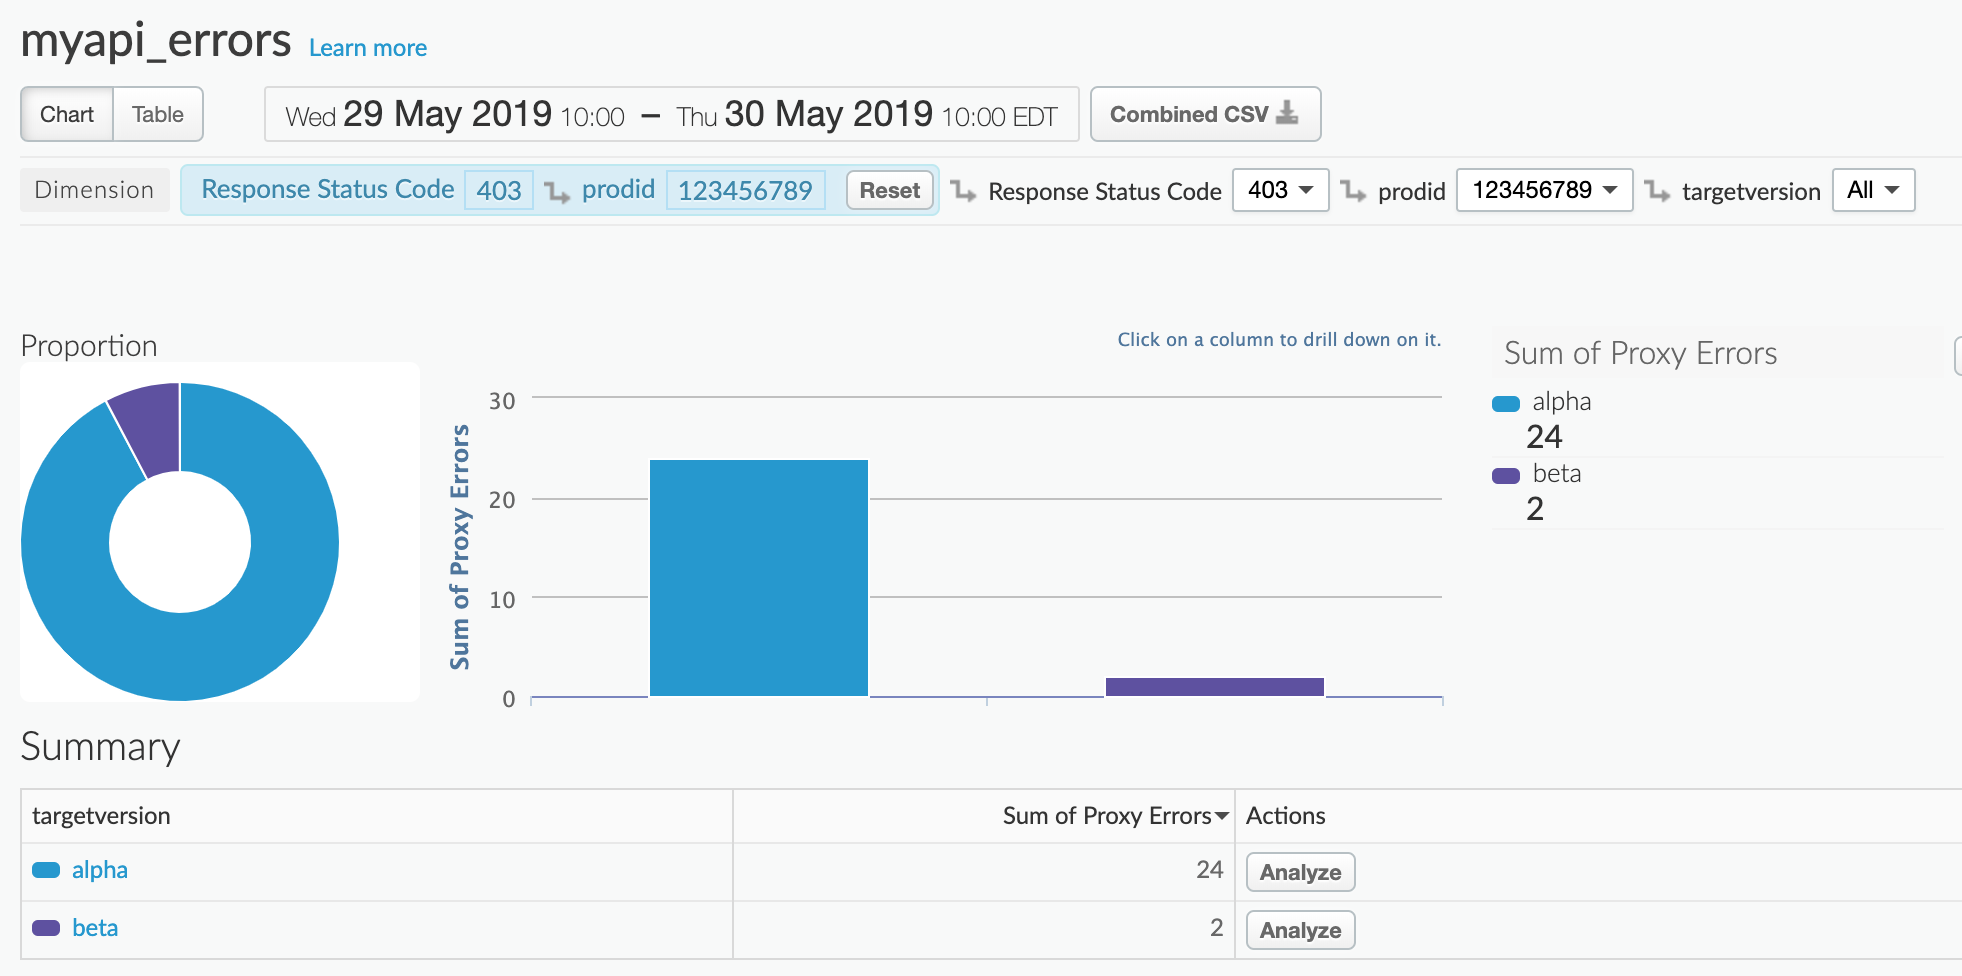
16. Click a target version under **Summary** to see the errors by user: