
You're viewing Apigee Edge documentation.
Go to the
Apigee X documentation. info
Create custom roles using the Edge UI, as described in the following sections. To create custom roles using the Edge API, see Creating roles with the API.
You must be an organization administrator to create custom roles.
What are custom roles?
Each Edge organization comes with a set of built-in roles that provide different permission levels. You can assign administrative users to any of these roles. However, you can also create unique roles that include the exact permissions you want. For example, you might want a role that allows access to API proxies only, nothing else. To do that, you'd create a custom role.
You can create custom roles to fine-tune access to the following Apigee Edge entities:
- API proxies
- API products
- Developer apps
- Developers
- Environments (Trace tool sessions and deployments)
- Custom reports (Analytics)
You can achieve even more granularity by applying role-based access to specific instances of an entity. For example, you can apply role-based access to all API products or to specific ones.
Precedence of permissions
More granular permissions take precedence over less granular ones. For example, permissions applied to a specific developer app take precedence over a less-granular permission applied to all developer apps.
Assigning permissions to group of entities vs. single instances
Set custom role permissions on a group of entities (for example, all API products) or on a single instance (for example, one specific API product).
If you set permissions on an instance, a privileged user can perform the permitted operations on that instance only. If set on a group (for example, all API proxies), the user can perform the operations on any instance in the collection.
You can also enable deploy and trace options on APIs and caches. These operations are also environment specific. That is, you can allow a role to deploy only to the prod environment.
Explore the Roles page
Access the Roles page, as described below.
Edge
To access the Roles page using the Edge UI:
- Sign in to https://apigee.com/edge as an organization administrator.
- Select Admin > Roles.
If you are not an organization administrator, this menu is not available.
Classic Edge (Private Cloud)
To access the Roles page using the Classic Edge UI:
- Sign in to
http://ms-ip:9000as an organization administrator, where ms-ip is the IP address or DNS name of the Management Server node. - Select Admin > Organization Roles.
If you are not an organization administrator, this menu is not available.
The Roles pages is displayed.
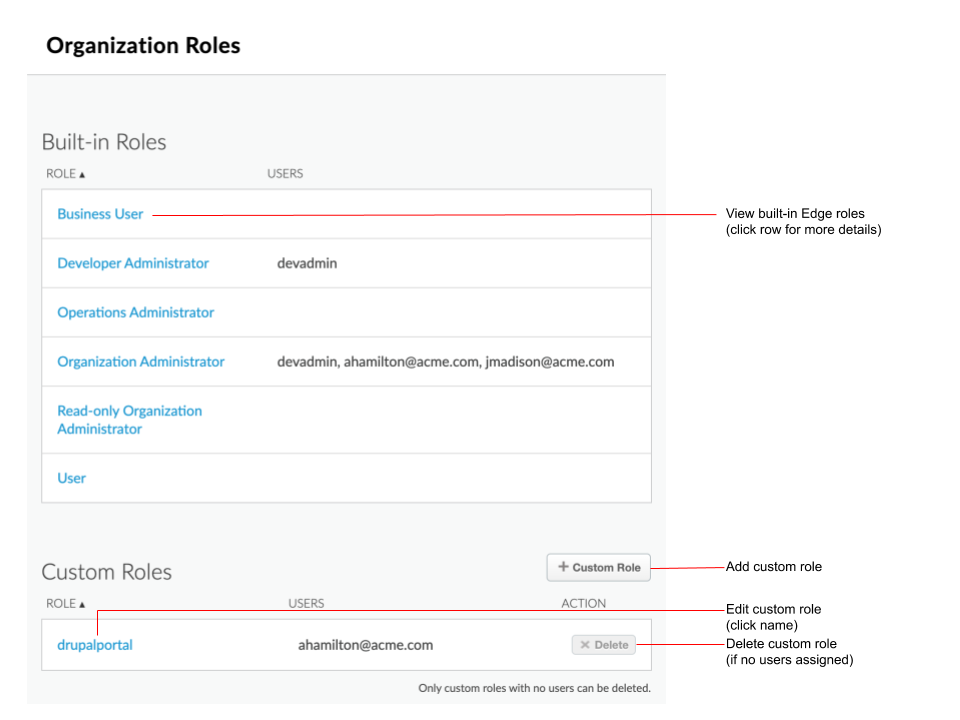
As highlighted in the figure, the Roles page enables you to:
- View the Edge built-in roles and the users to which they are assigned
- View, add, edit, and delete custom roles, and view the users to which they are assigned
Add custom roles
To add a custom role:
- Access the Roles page.
- Click + Custom Role.
- Enter a name for the custom role.
Note: Custom role names cannot contain spaces or some special characters.
- Add permissions, as required.
- Click Save.
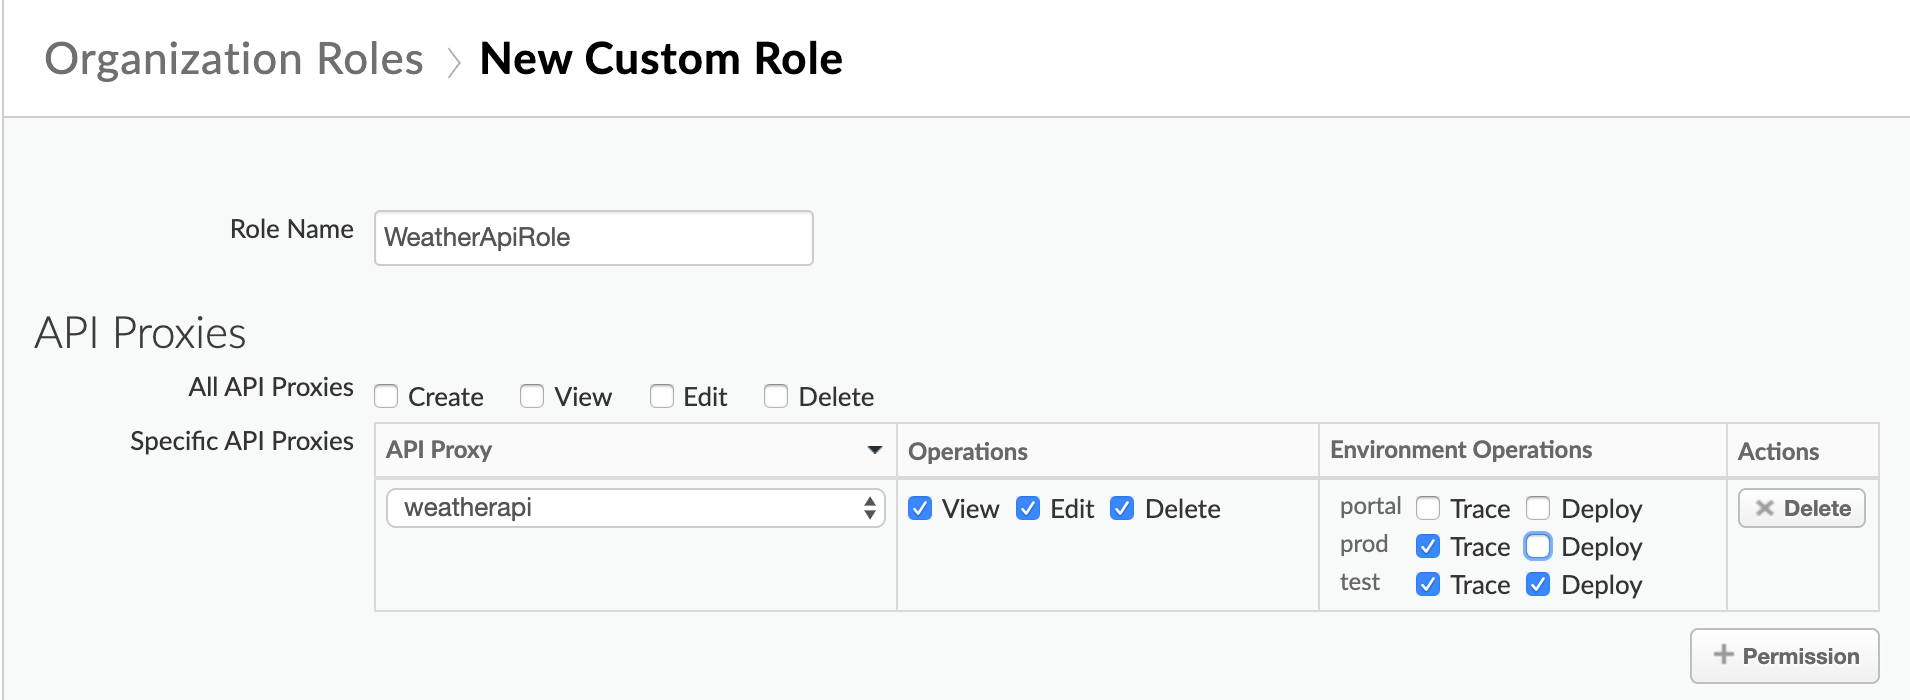
The following figure shows a portion of the New Custom Role dialog. For example, this role is
called WeatherApiRole, and it allows a user to view, edit, and delete an API proxy with the path
/weatherapi. In addition, this user can view trace sessions in both prod and test
environements, but can only deploy to the test environment.
Edit custom roles
To eidt a custom role:
- Access the Roles page.
- Click the name of a custom role in the list.
- Click Edit.
- Edit the custom role, as required.
- Click Save.
Delete custom roles
To delete a custom role:
- Access the Roles page.
- Click Delete adjacent to the custom role you want to delete.
- Edit the custom role, as required.
- Click Save.