
You're viewing Apigee Edge documentation.
Go to the
Apigee X documentation. info
The Timeline provides an historical view of API monitoring data that helps you to identify trends and gain insights into overall performance.
Select Analyze > API Monitoring > Timeline in the Edge UI to display the Timeline, as shown in the following figure.
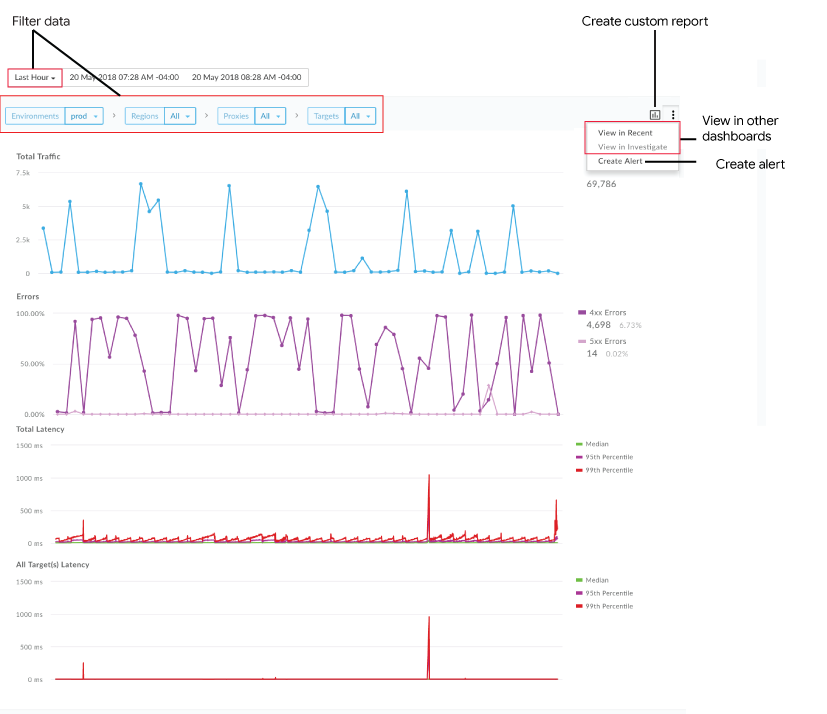
The Timeline enables you:
Quickly determine:
- Total traffic
- Percentage of traffic that resulted in errors (Total Errors/Total Traffic) for 4xx and 5xx errors.
- Total response latency (ms) for the selected component(s) for the median, 95th, and 99th percentile.
- Total response latency (ms) for all targets for the median, 95th, and 99th percentile.
Note: The Latency graphs are displayed only if you select a region and an API proxy, and the time range selected is no greater than 7 days. The median, P90, and P99 latency values are calculated over 5, 15, and 60 minute intervals, respectively. Each value is updated in the graph at 1, 3, and 10 minute intervals, respectively. For example, the P90 latency value is updated in the graph every 3 minutes using data captured over the last 15 minutes.
Filter the Timeline dashboard:
- Select the desired timeline (1 hour to 3 months). Note: Latency graphs are displayed for time ranges that are no greater than 7 days.
- Select the environment.
- For Region, Proxies, and Targets, select a specific component or All to view data for all items within a particular dimension.
Create a custom report based on the selected metrics and add additional dimensions.
Create an alert based on the current conditions.
Navigate to the Recent or Investigate dashboard while maintaining the currently selected context. Note: Options are grayed out if they are not applicable to the currently selected condition.
Hover over different points on the graph to display at-a-glance total traffic counts, error counts, and execution latencies, respectively, at each point.
Create a custom report from the Timeline dashboard
Create a custom report based on the selected set of conditions. You can edit the custom report after it is created, to add or delete metrics and dimensions, as required. For example, you may wish to narrow your investigation to a particular access token, developer app, or API proxy. For more information, see Analytics metrics, dimensions, and filters reference.
For more information, see Creating custom reports.
To create a custom report from the Timeline dashboard:
- Click Analyze > API Monitoring > Timeline in the Edge UI.
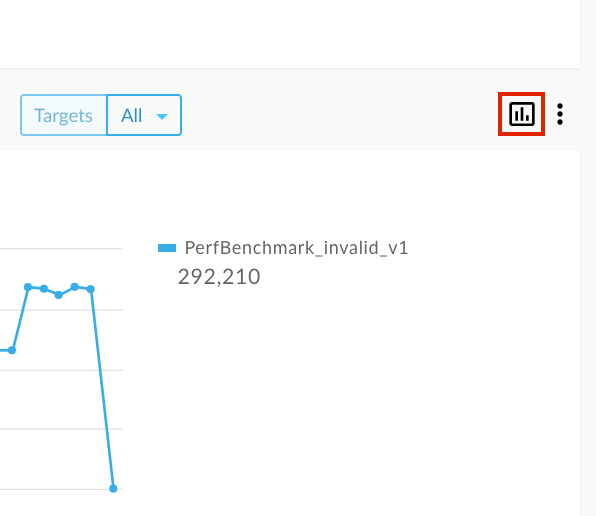
Select an API proxy or target service in the Timeline filter drop-downs. Note: Custom reports are not available if the Proxies and Targets filters are set to
All.In the right corner, click
 .
.
The custom report page displays in a new tab with relevant fields pre-populated and default dimensions and metrics. By default, the custom report is named as follows:
API Monitoring Investigate GeneratedNote: If a custom report already exists for the current context, it is opened.Edit the custom report, as desired, and click Save.
Click the name of the report on the list and run the custom report.