You're viewing Apigee Edge documentation.
Go to the
Apigee X documentation. info
This document describes how to configure the Microsoft Active Directory Federation Services (ADFS) as the identity provider for an Edge organization that has SAML authentication enabled. This example uses Windows 2012 R2 ADFS 3.0 version.
For information on enabling SAML authentication for an Edge organization, see Enabling SAML Authentication for Edge.
Configuring the Relying Party
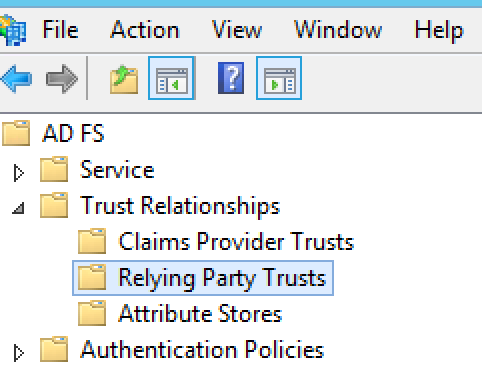
- Open the ADFS Management console.
- Expand Trust Relationships in the tree structure. The Relying
Party Trusts folder appears.
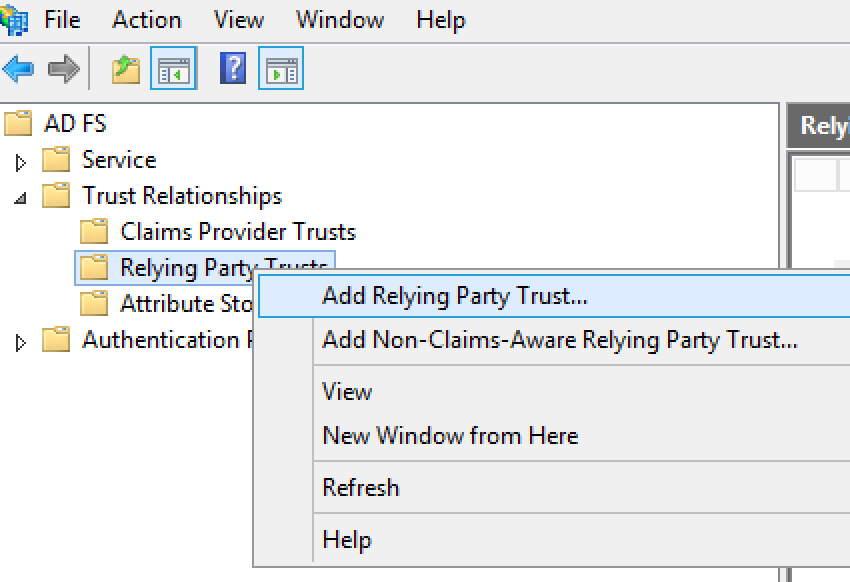
- Right click on Relying Party Trusts and then select Add Relying
Party Trust to open the Relying Party Trust Wizard.
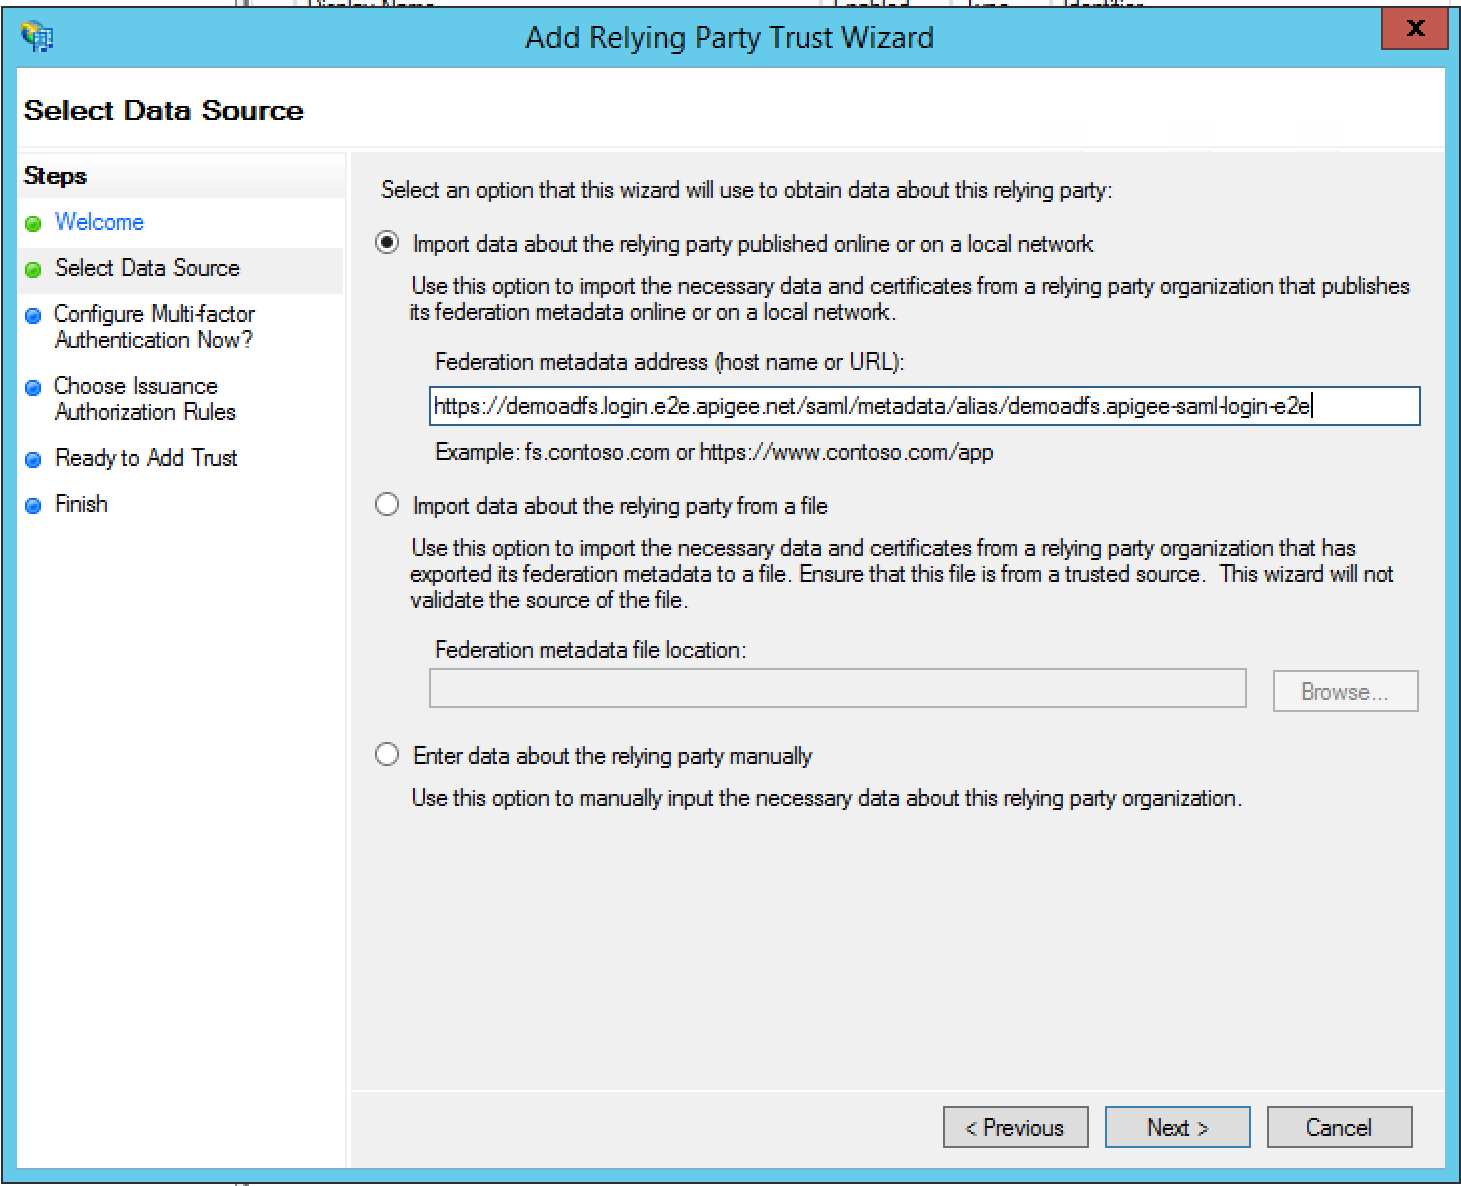
- Click Start in the wizard to begin.
- In the Select Data Source dialog box, use the Import data about
the relying party published online or on a local network option to import the metadata
URL provided to you by Apigee, and click Next.
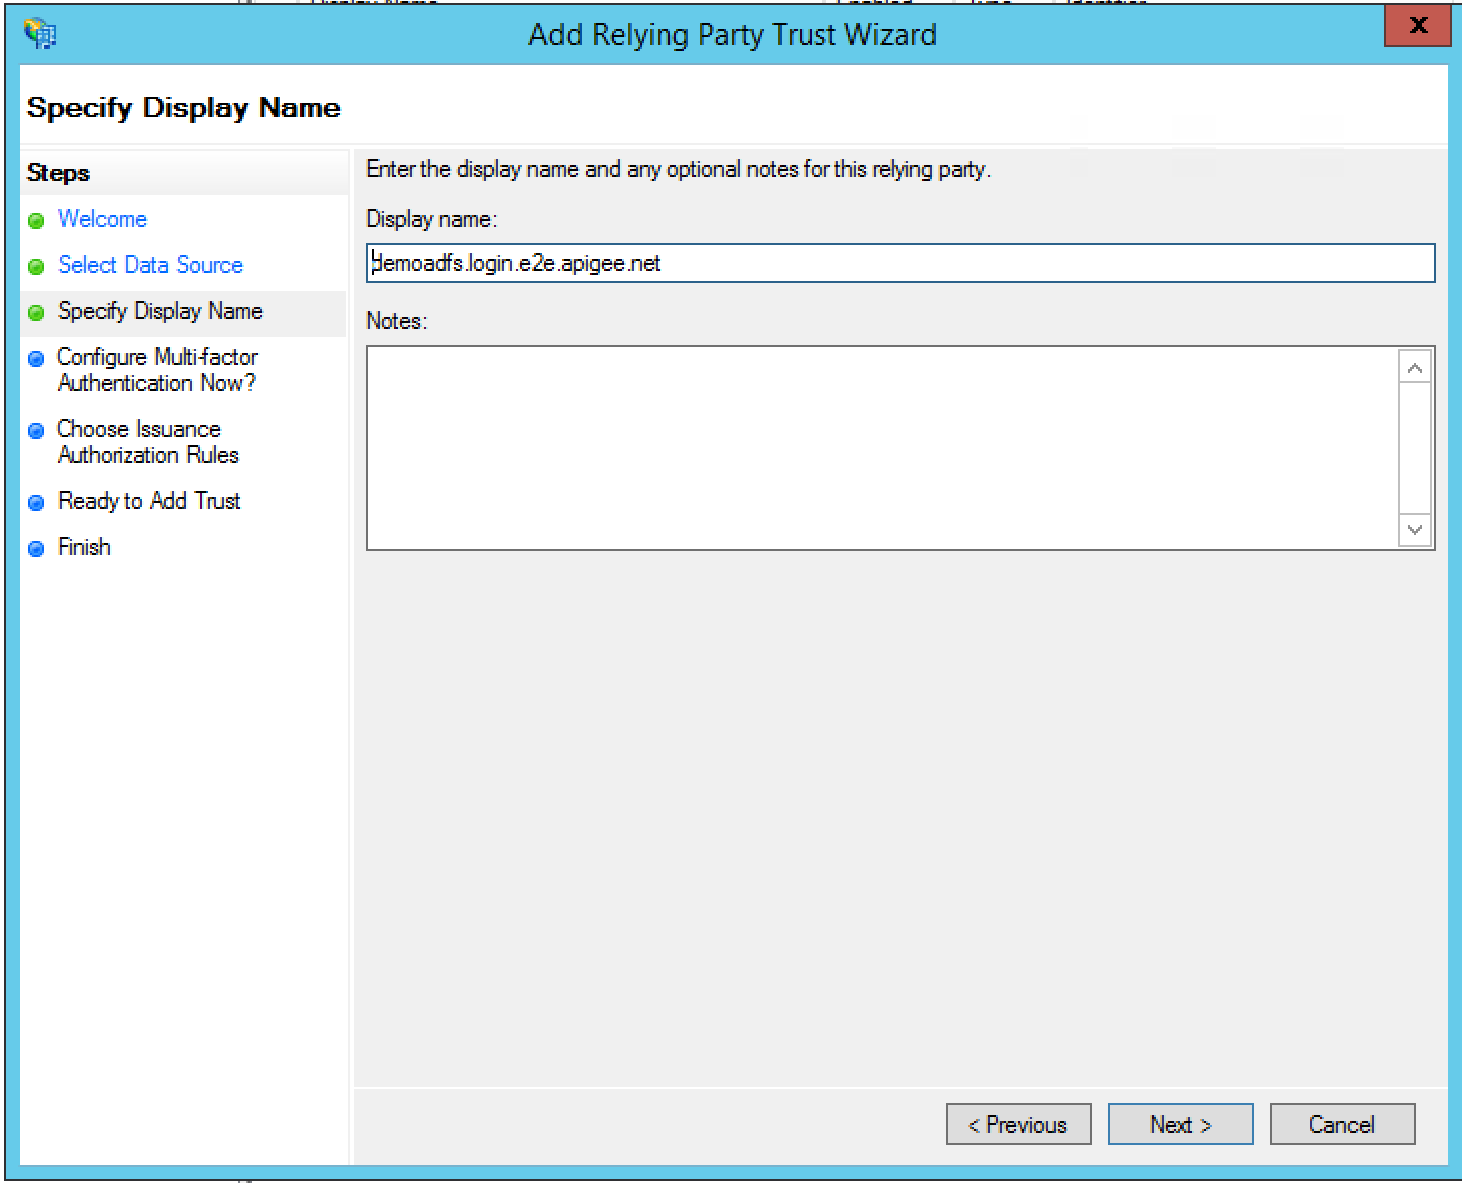
- Specify the display name, and click Next. By default, ADFS uses
“zonename.login.apigee.com” as the display name. You can leave it
or change it to “Apigee Edge” as the relying party display
name.
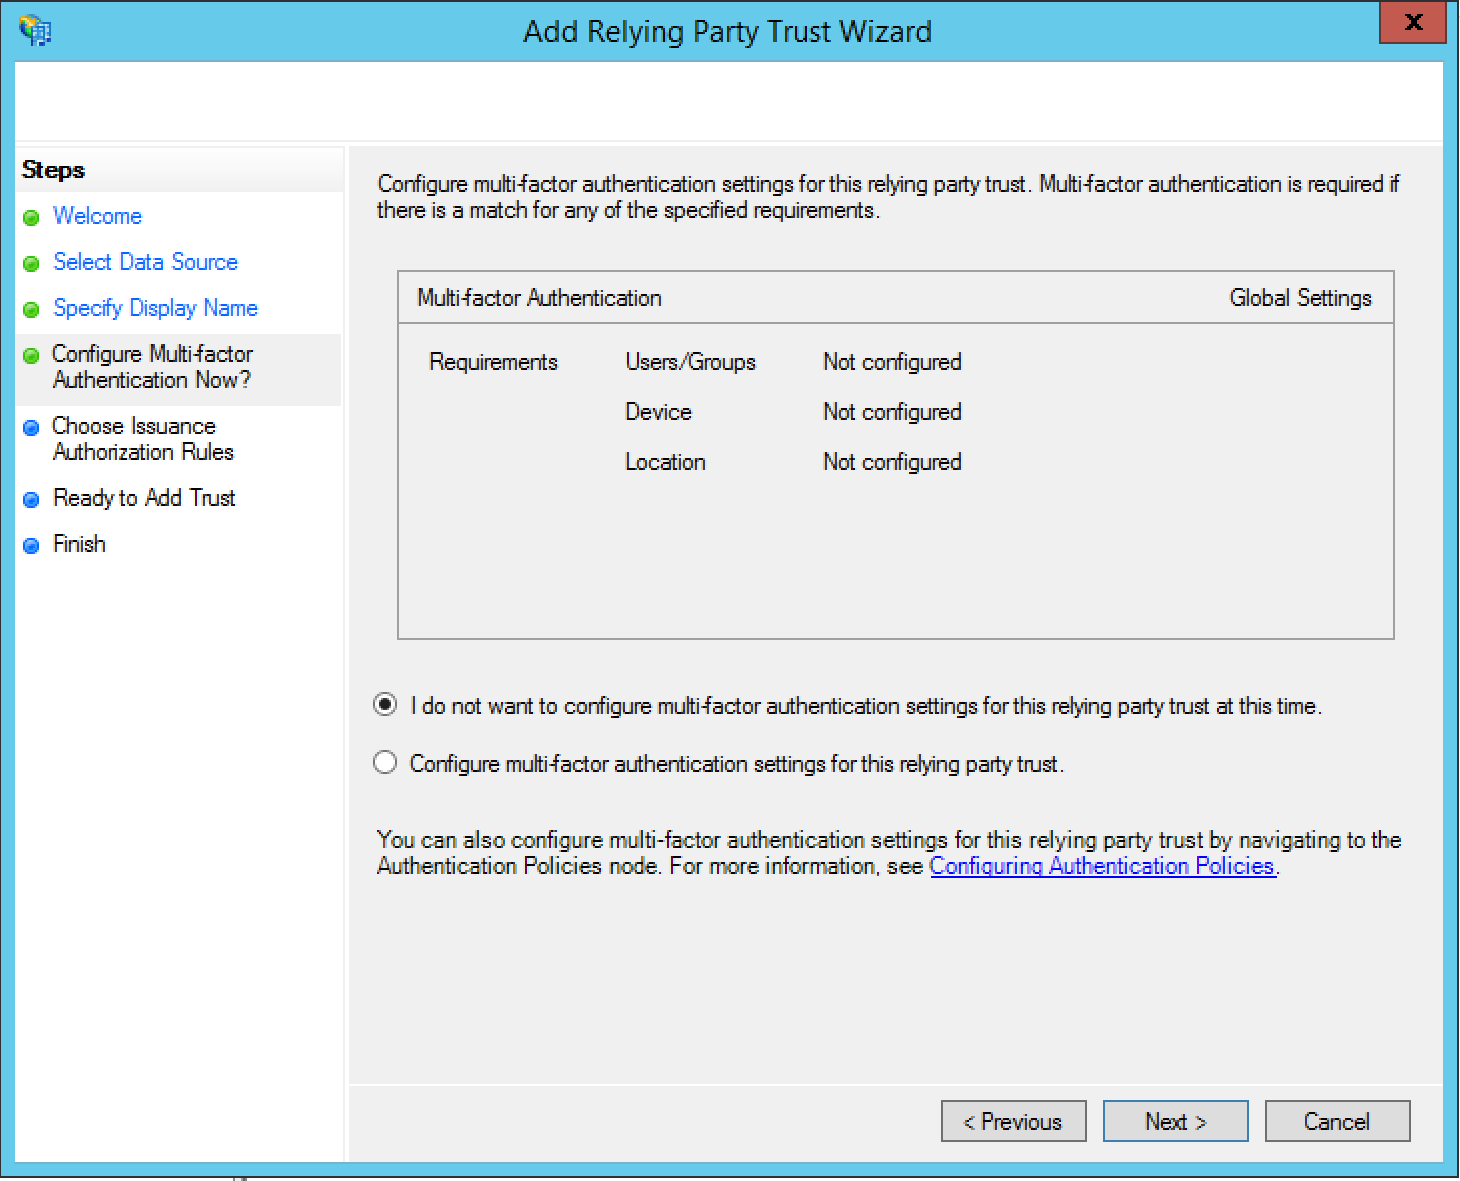
- In the Configure Multi-factor Authentication Now? dialog box, select
I do not want to configure multi-factor authentication settings for this relying party
trust at this time, and select Next.
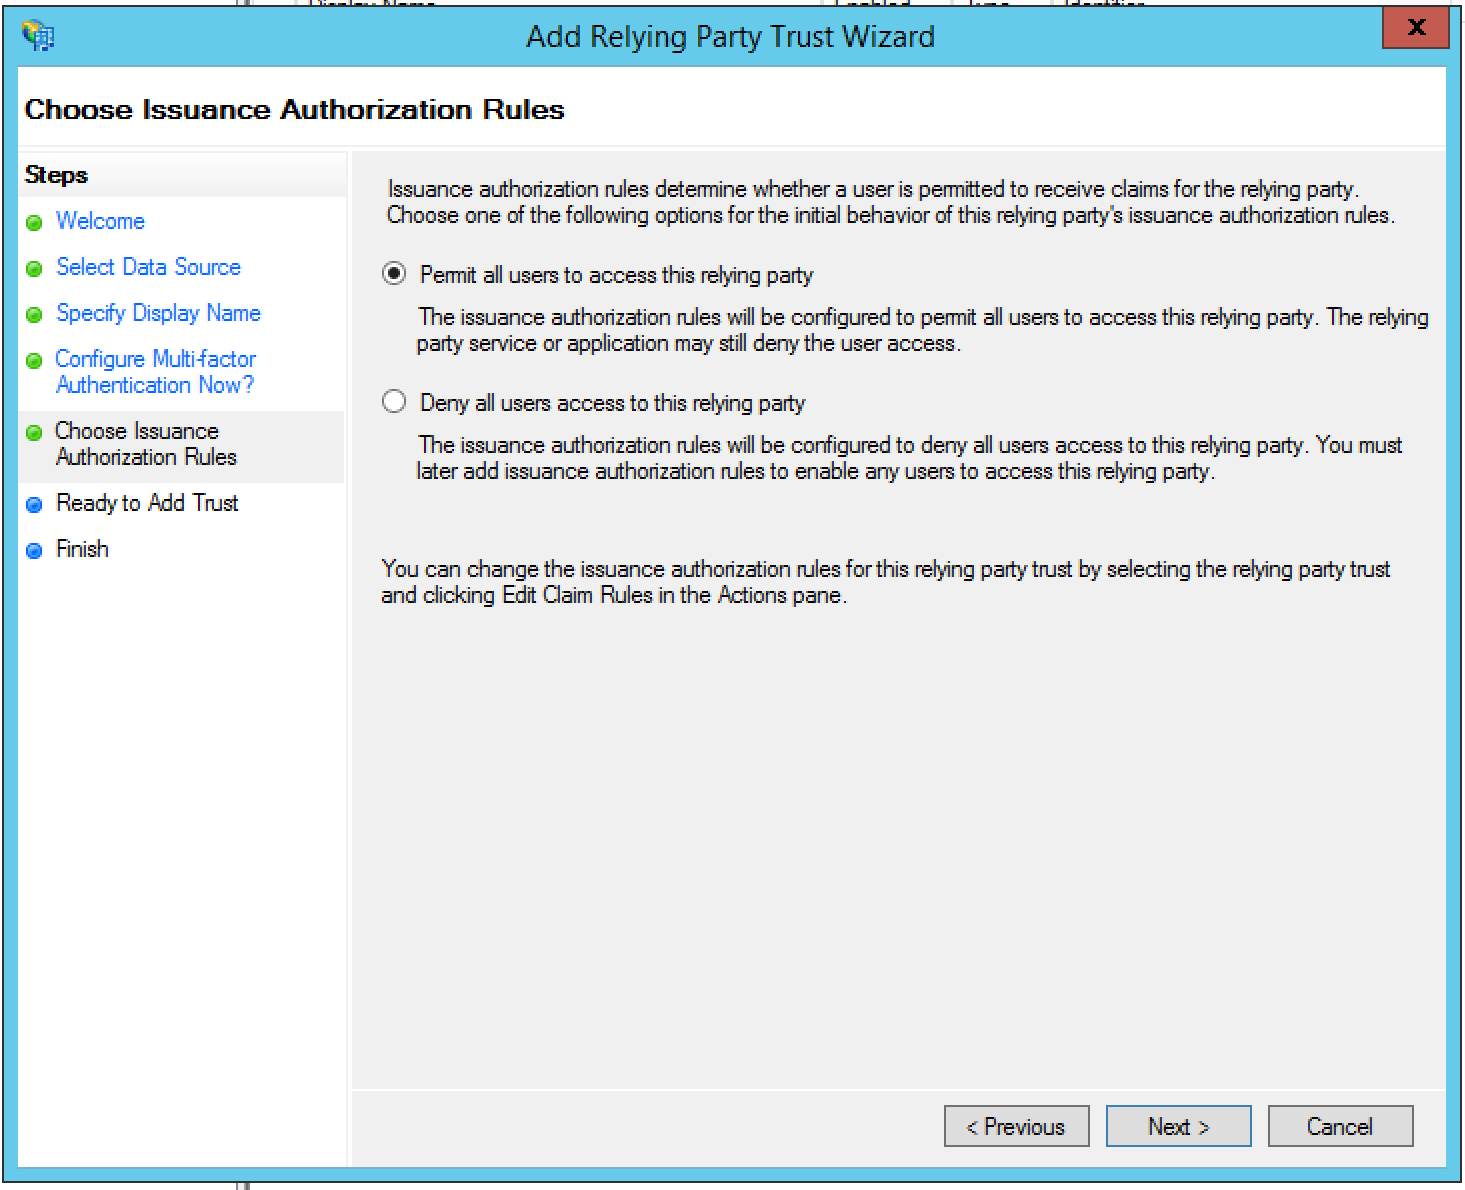
- In the Choose Issuance Authorization Rules dialog box, select
Permit all users to access this relying party, and click
Next.
- In the Ready to Add Trust dialog box, review the settings, and then click
Next to save your settings.

- Click Close to close the wizard. The Edit Claim Rules dialog box should appear, as described in the next section.
Add Claim Rules
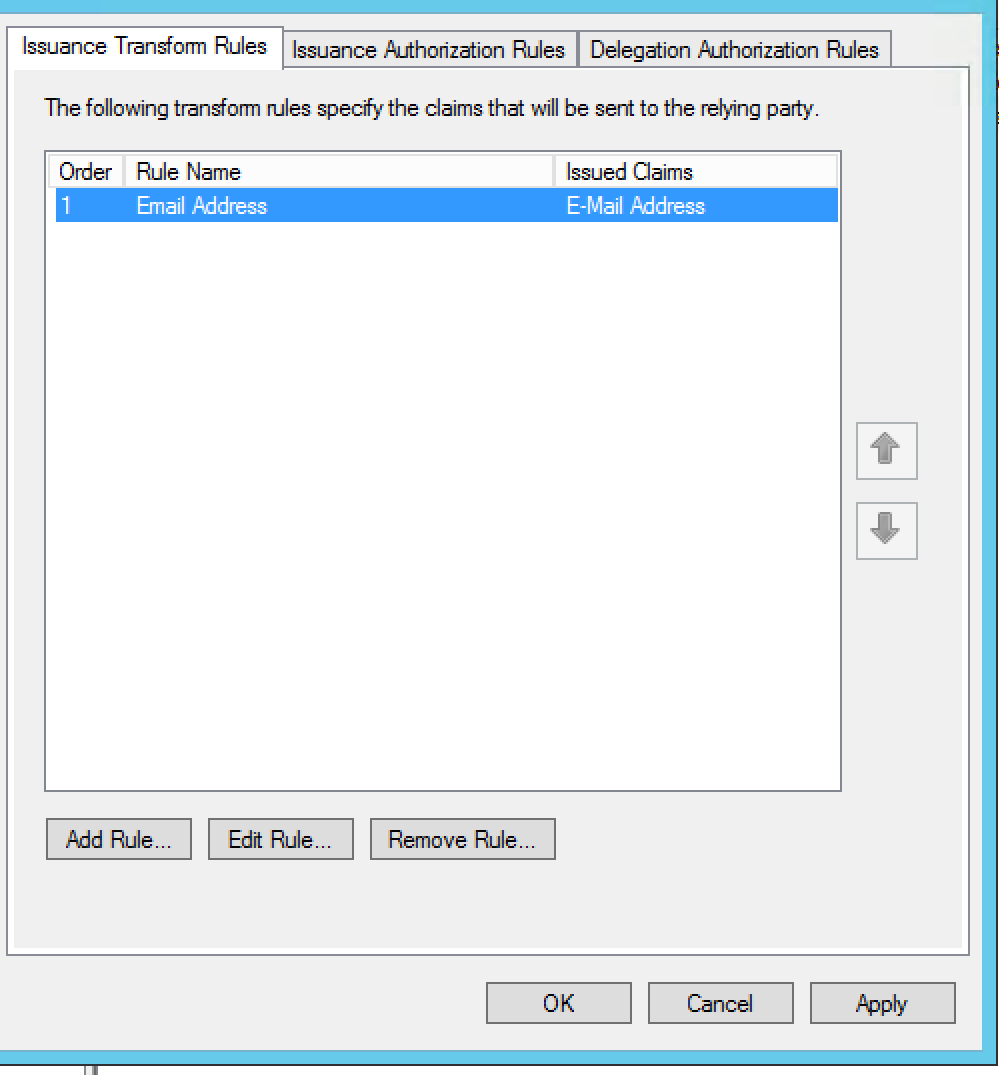
The Edit claim rules dialog box should open automatically when you complete the Relying Party Trust Wizard in the previous section. If it does not appear, click Edit Claim Rules in the left panel.
In this section you add two claim rules.
- Click Add Rule.
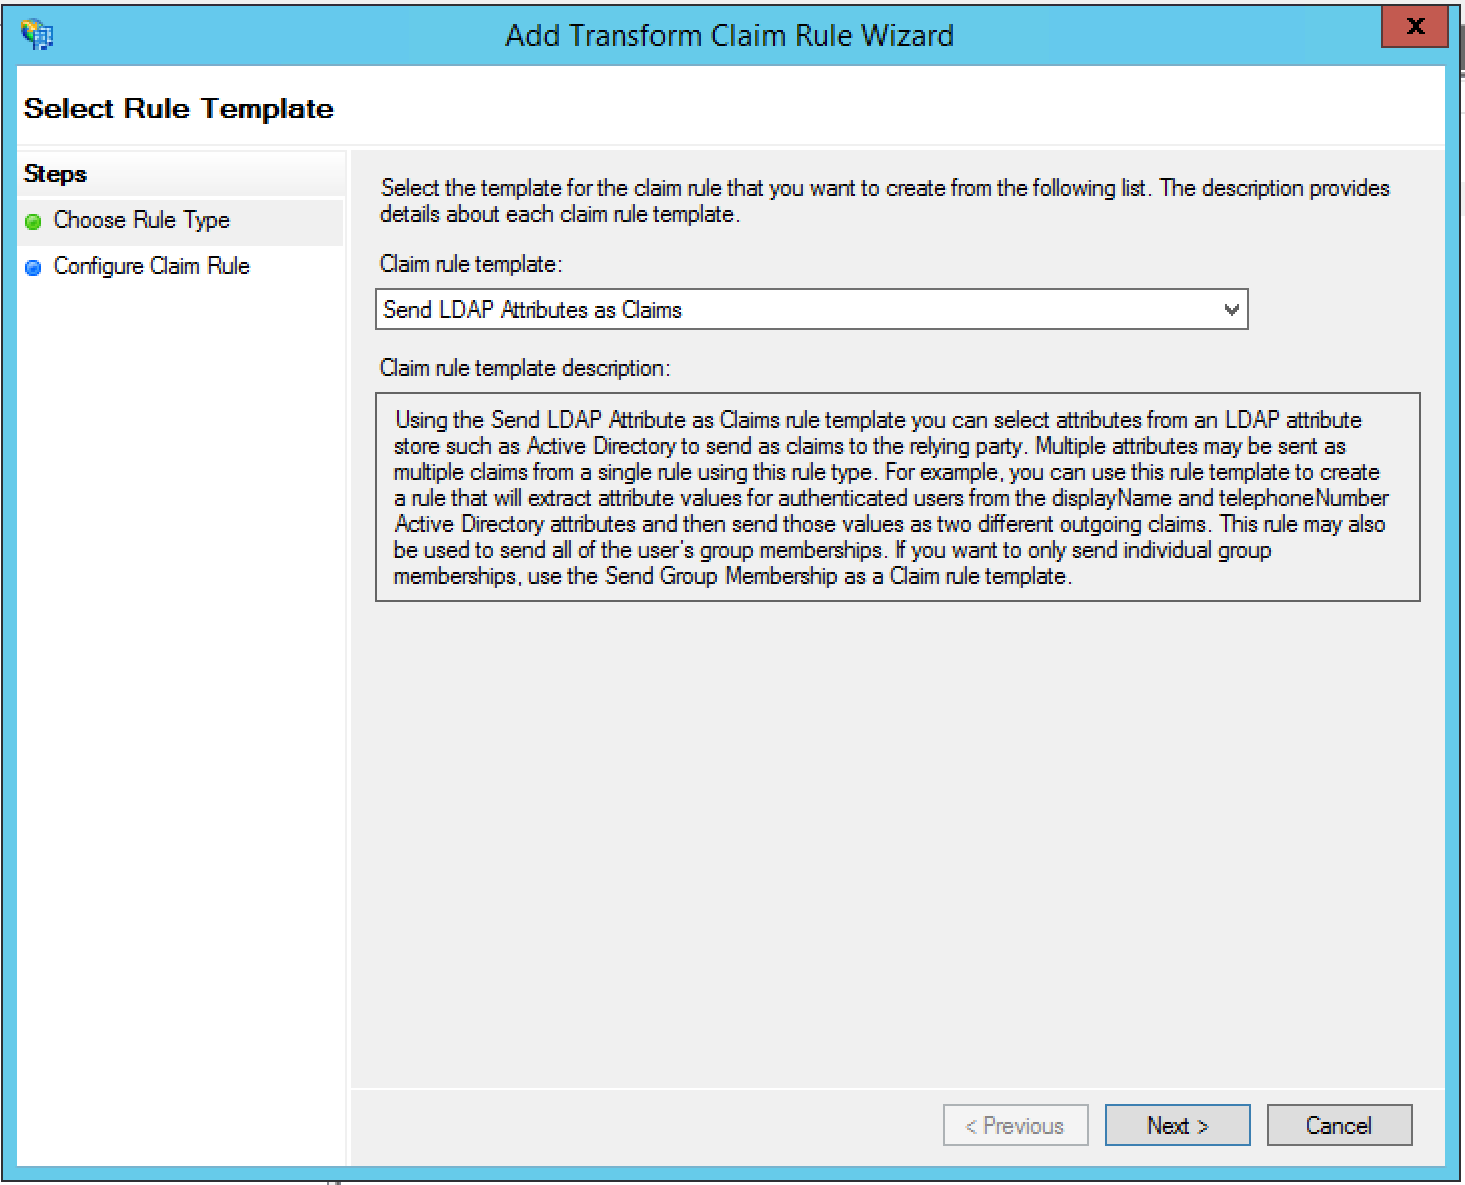
- In Choose Rule Type, set Claim rule template as
“Send LDAP Attributes as Claims”, and click Next.
- Specify the following information:
- Claim rule name = Email Address
- Attribute store = Active Directory
- Outgoing Claim Type = E-Mail Address
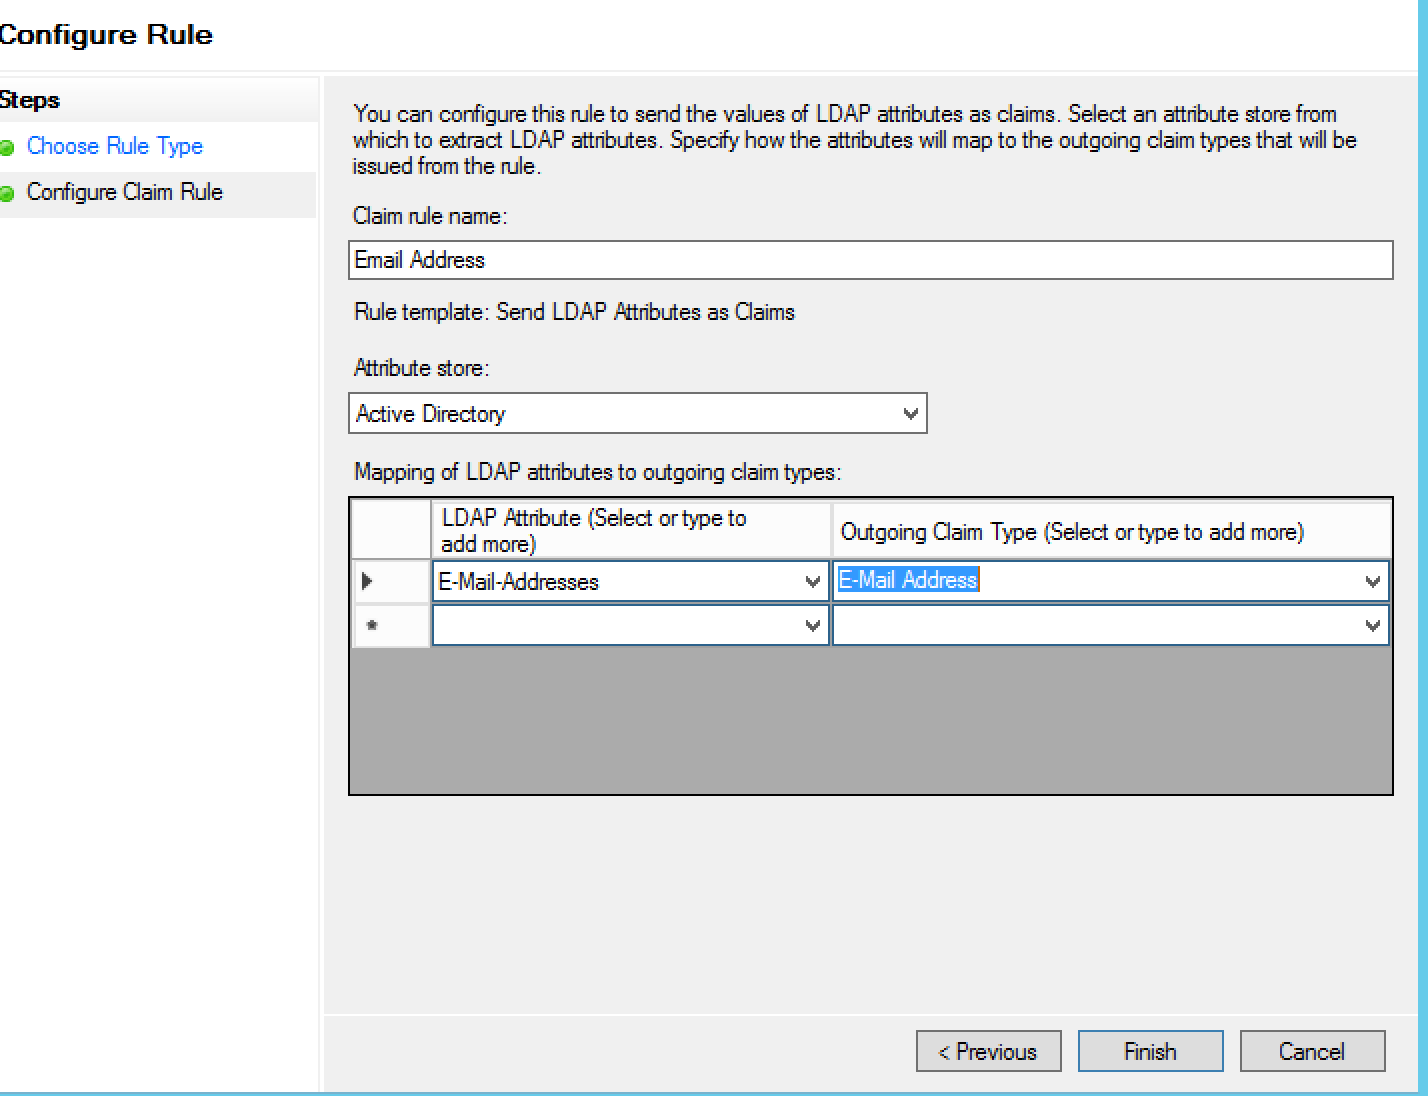
- Click Finish. The Edit claim rules dialog box
appears:
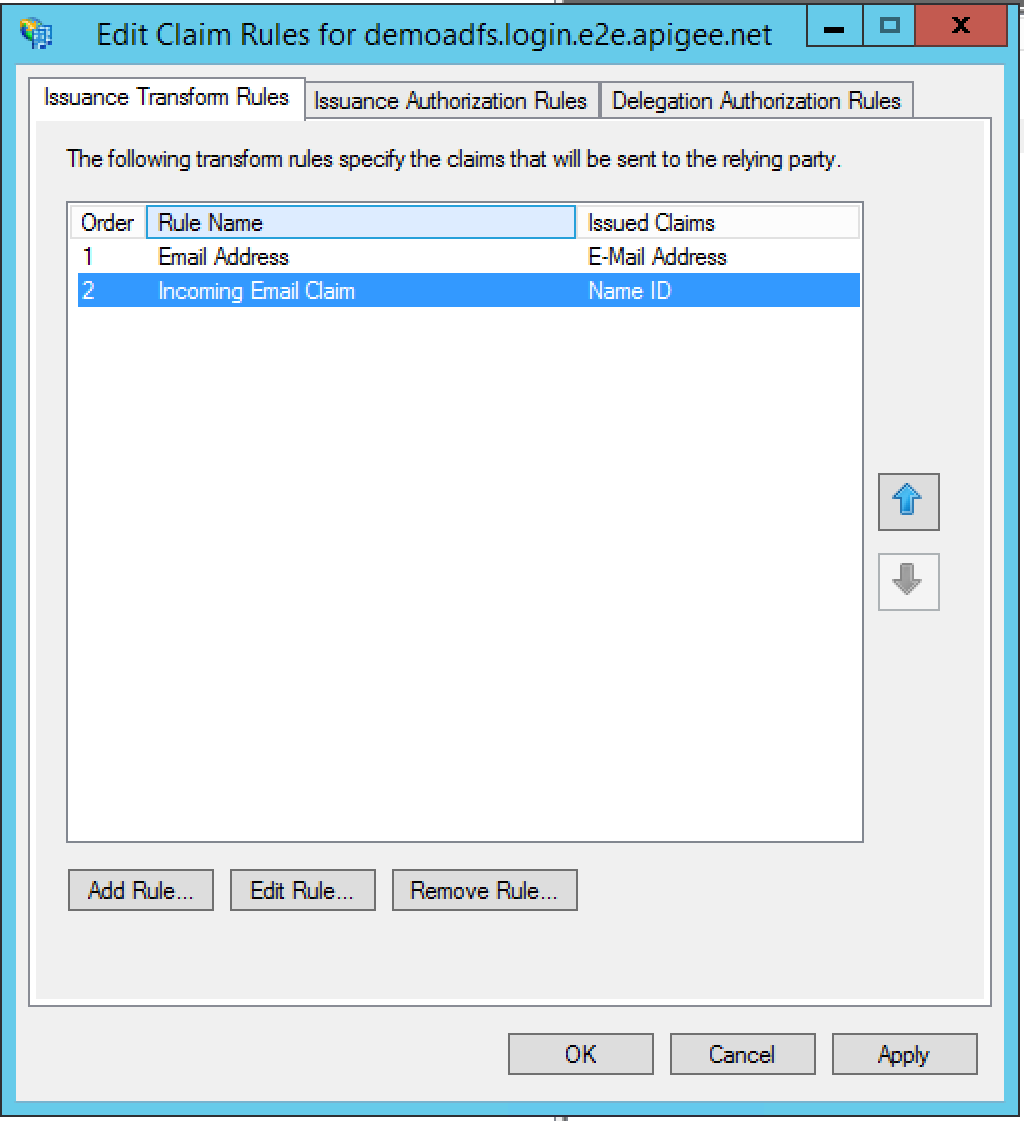
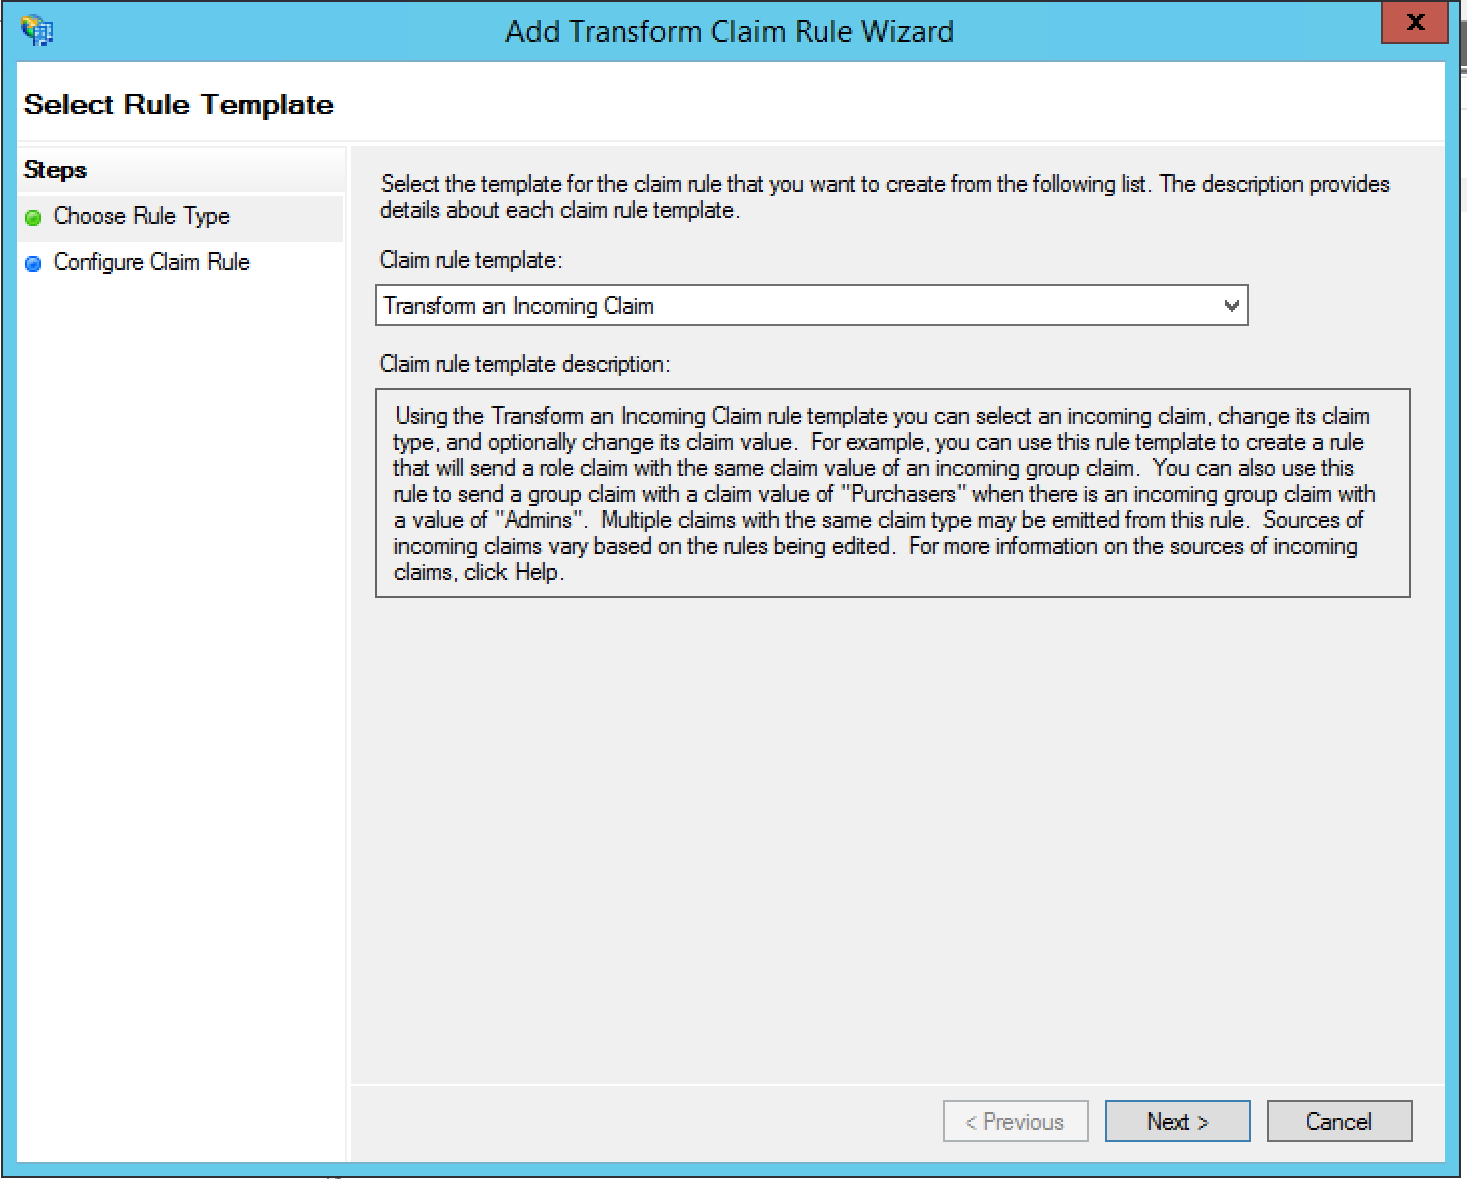
- Click Add Rule to add a second claim that transforms the incoming claim.
- Select Transform an Incoming Claim as the Claim rule
template, and click Next:
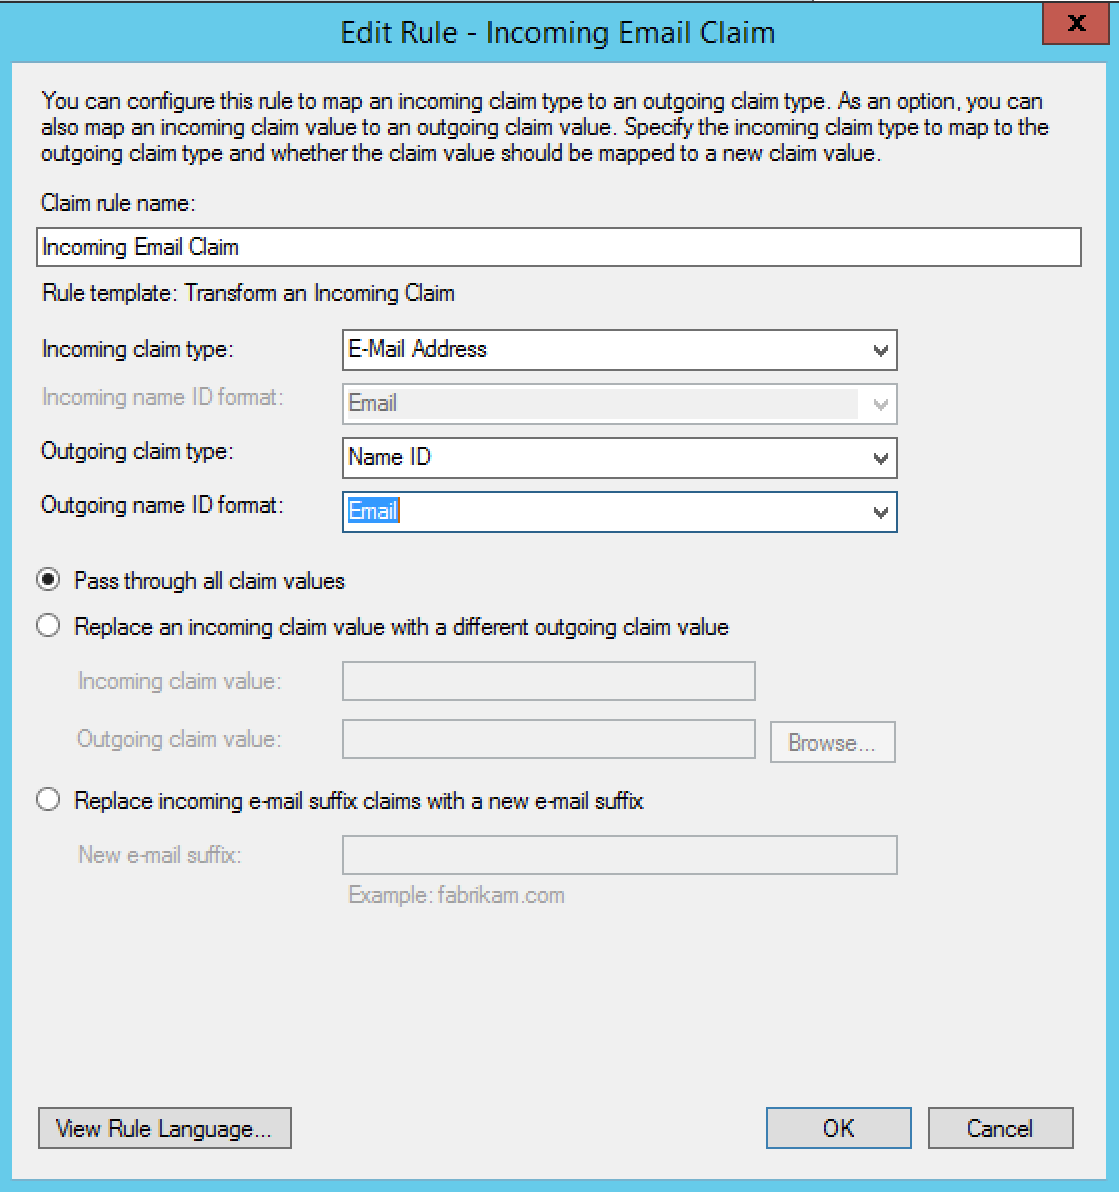
- Specify the following information:
- Claim rule name = Incoming Email Claim
- Incoming Claim Type = E-Mail Address
- Outgoing claim type = Name ID
- Outgoing name ID format = Email
- Click OK. You should see two claim rules in the Edit claim
rules dialog box:

- Click OK. The new relying party trust appears in the left navigation tree.
- Right-click on the relying party trust and select Properties.
- Browse to the Advanced tab. Set the Secure hash algorithm
to SHA-256 and then click Apply.

You have completed the configuration.
