
You're viewing Apigee Edge documentation.
Go to the
Apigee X documentation. info
In this step, you'll publish an API to the portal by performing the following steps:
1. Create an OpenAPI Specification
2. Create an API proxy from a spec
3. Create an API product
4. Publish the API to your portal
Step 1: Create an OpenAPI Specification
Each OpenAPI Specification serves as the source of truth throughout the API lifecycle. The same specification is used at each phase in the API lifecycle, from development to publishing.
To create an OpenAPI Specification:
- Select Develop > Specs in the left navigation bar to open the Specs page.
- Click + Spec > Import URL.
- Enter the following information in the import dialog:
- Import name: helloworld
Import Url: https://raw.githubusercontent.com/apigee/api-platform-samples/master/default-proxies/helloworld/openapi/mocktarget.yaml
Click Import.
Step 2: Create an API Proxy from a spec
Create an API proxy from an OpenAPI Specification that describes the API.
To create an API proxy from an OpenAPI Specification:
- On the Specs page, position your cursor over the helloworld spec to display the actions menu.
- Click
 to generate an API proxy from the spec.
The Build a Proxy wizard is opened and the Details page is pre-populated using values from the OpenAPI Specification. - Edit the Description field as follows: API proxy for hello world.
- Click Next.
On the Policies page:
- Under Security: Authorization, select Pass through (no authorization).
- Under Security: Browser, select Add CORS headers .
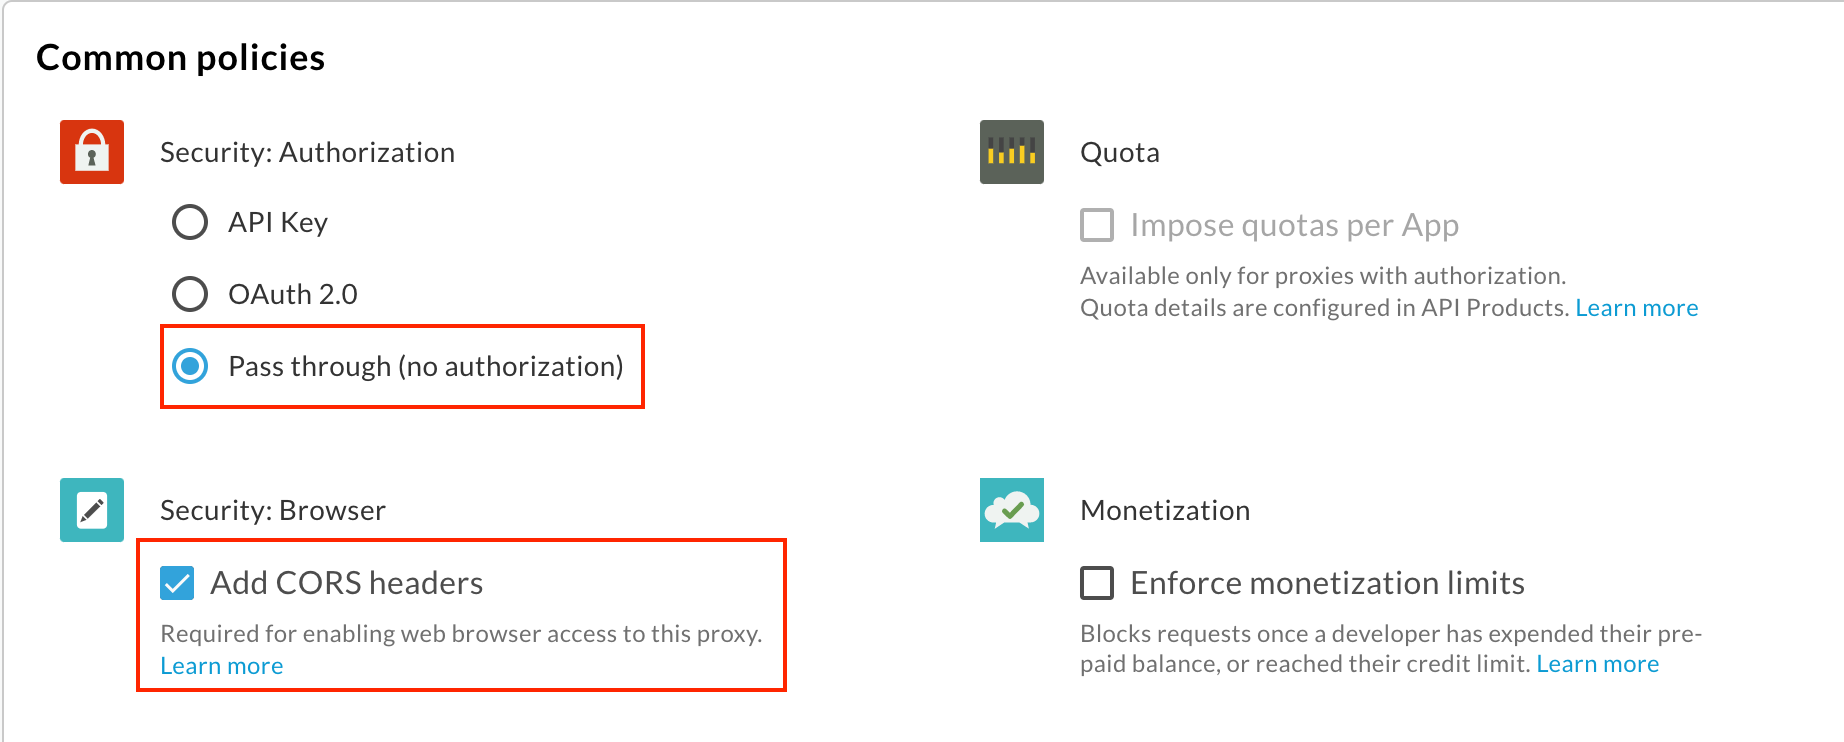
Click Next.
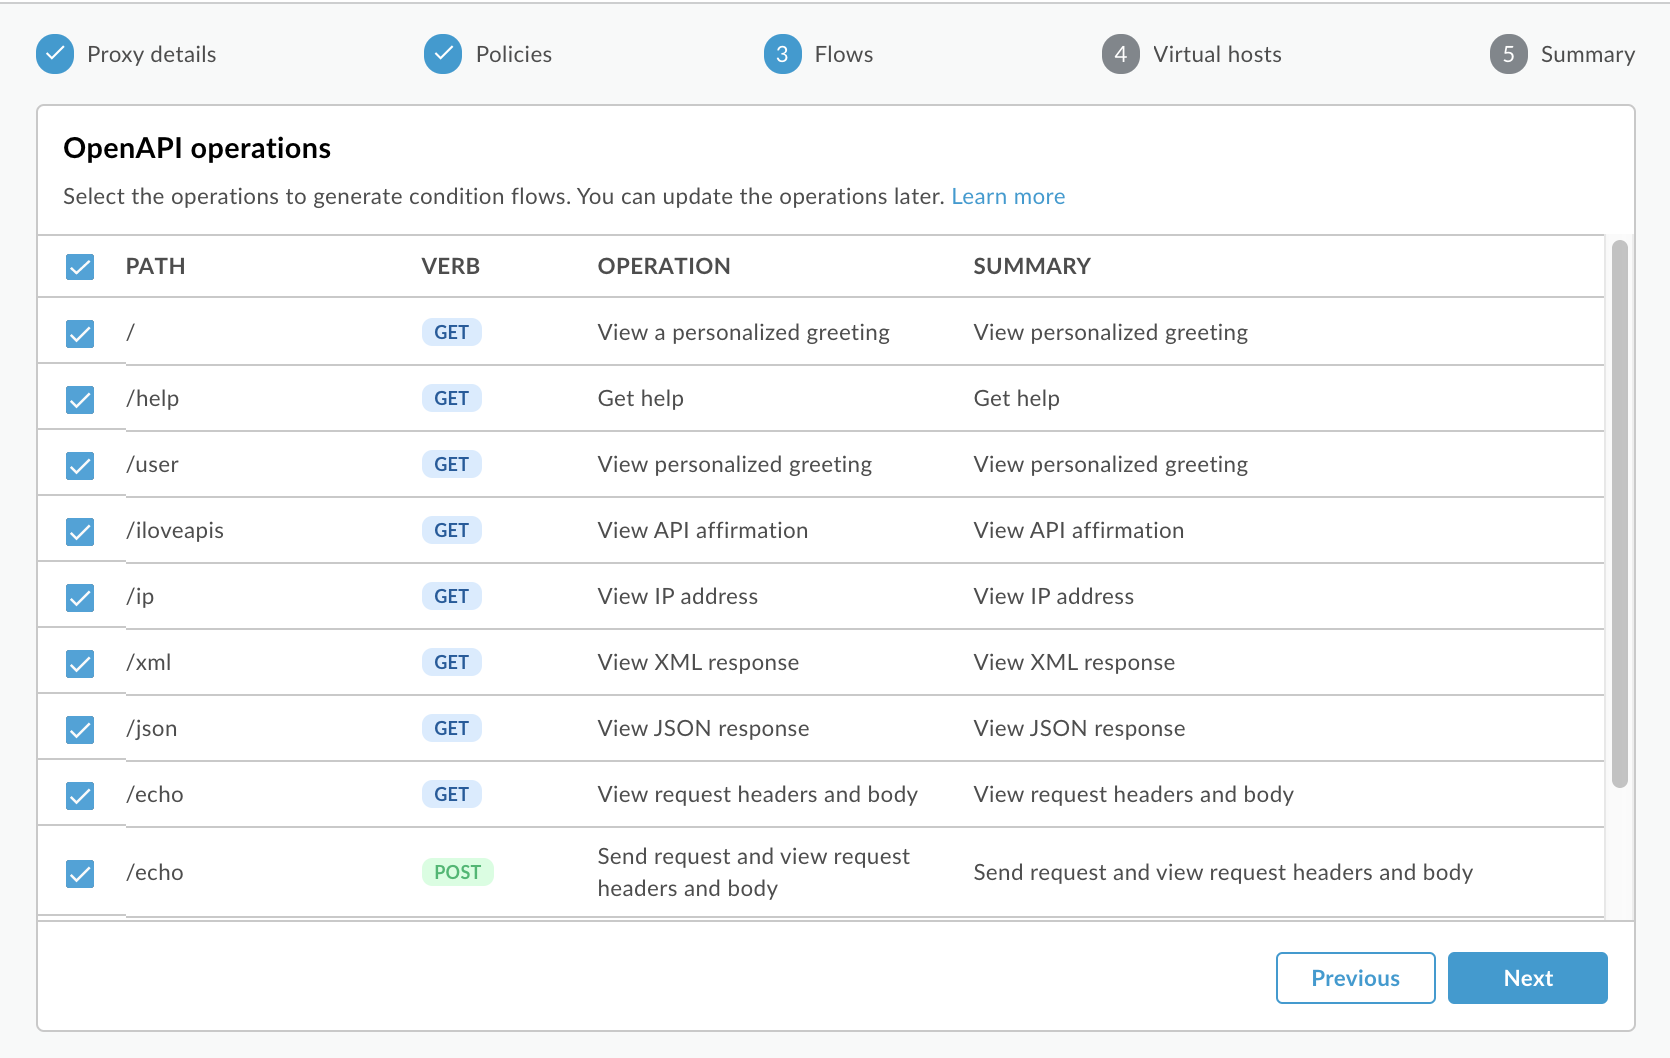
On the Flows page, make sure all operations are selected and click Next.
On the Virtual Hosts page, make sure all virtual hosts are selected and click Next.
On the Summary page, select the environment to which you want to deploy under Optional Deployment.
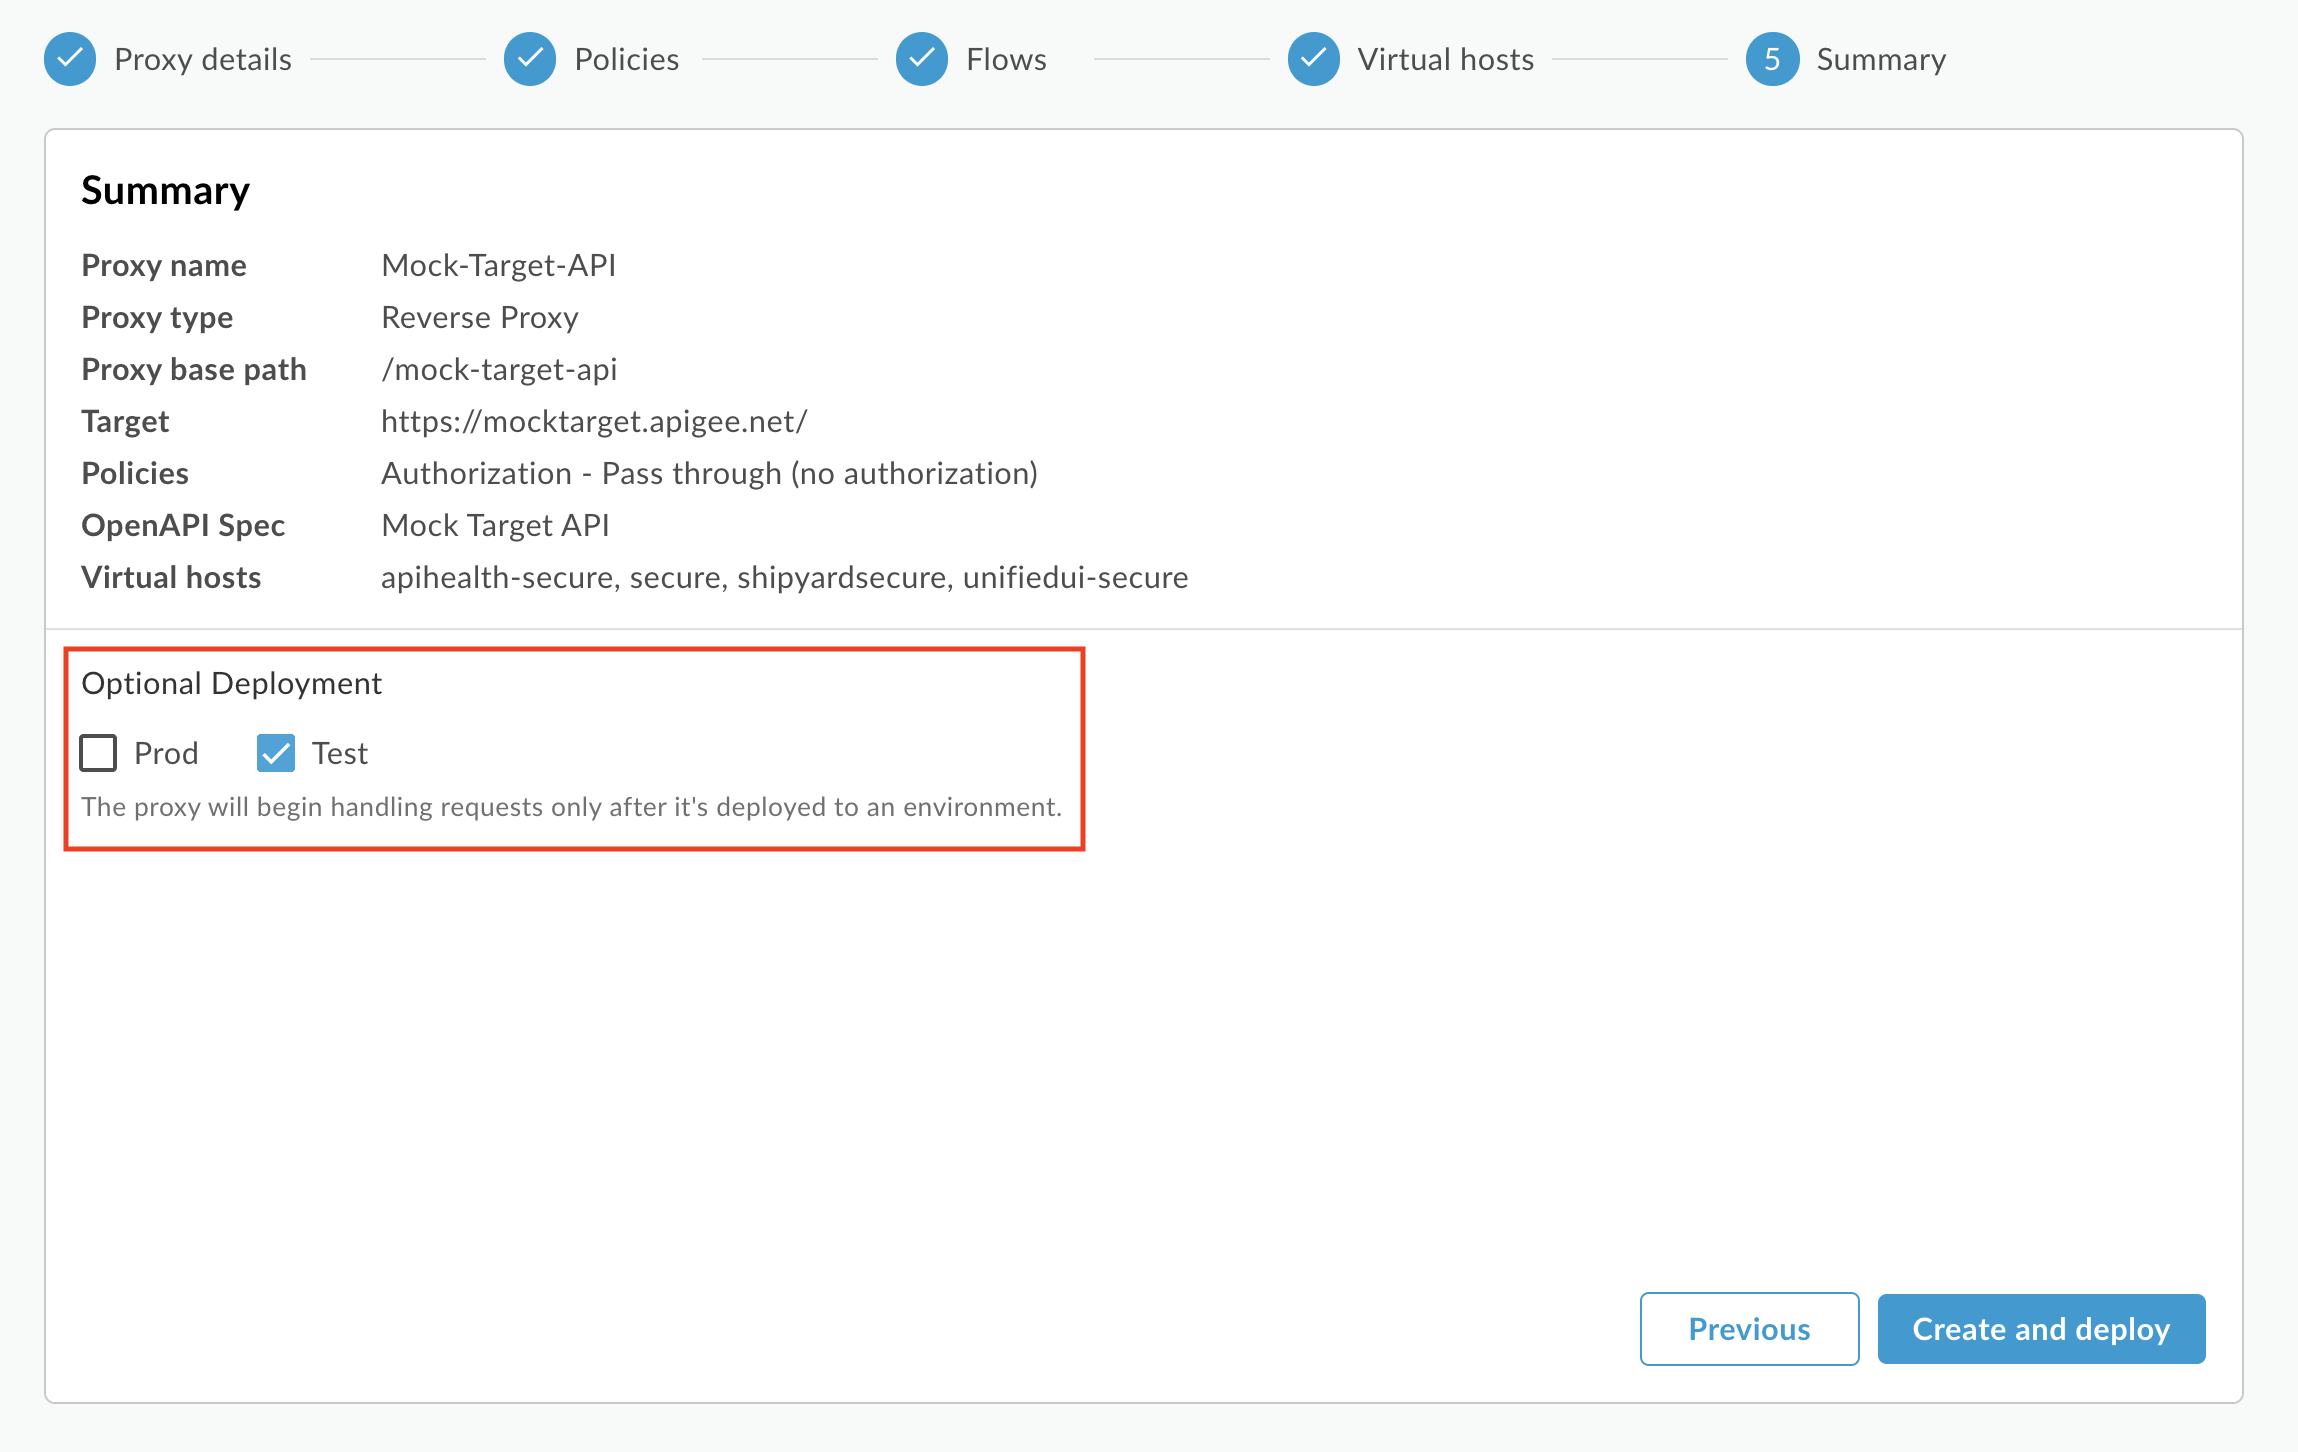
Click Create.
On the Summary page, you'll see an acknowledgement that your new API proxy was created successfully and deployed to your test environment.
Step 3: Create an API product
Create an API product that contains the API resources that you want to expose to your API consumers.
To create an API product:
- Select Publish > API Products in the left navigation bar to open the API Products page.
-
Click + API Product.
The New Product page is displayed. -
Enter the Product Details for your API product.
Note: The Display Name and Description fields are displayed in the portal when you publish the API product, by default. You can edit the values in Step 4: Publish the API to your portal.
Field Value Name Hello World Display Name Hello World Description Simple hello world example Environment Select environment where API proxy is deployed. Access Public Automatically approve access requests Enabled Quota (leave blank) Allowed OAuth Scopes (leave blank) -
Under API resources, click Add a proxy to identify the API proxies to add to your API product.
The Add API Resource dialog displays. - Click API Proxy (if it's not already selected) and select Mock-Target-API in the list.
- Click Add.
-
Click Save to save the API product.

Step 4: Publish the API to your portal
Publish the API to your portal to enable your customers to learn about and use it.
To publish the API to your portal:
- Navigate to the APIs page in your portal:
- Select Publish > Portals in the left navigation bar.
- Click in the My first portal row to open the portal.
- Click API catalog to display the APIs page.
- Click +.
- Select Hello World in the Add an API product to the catalog dialog and click Next.
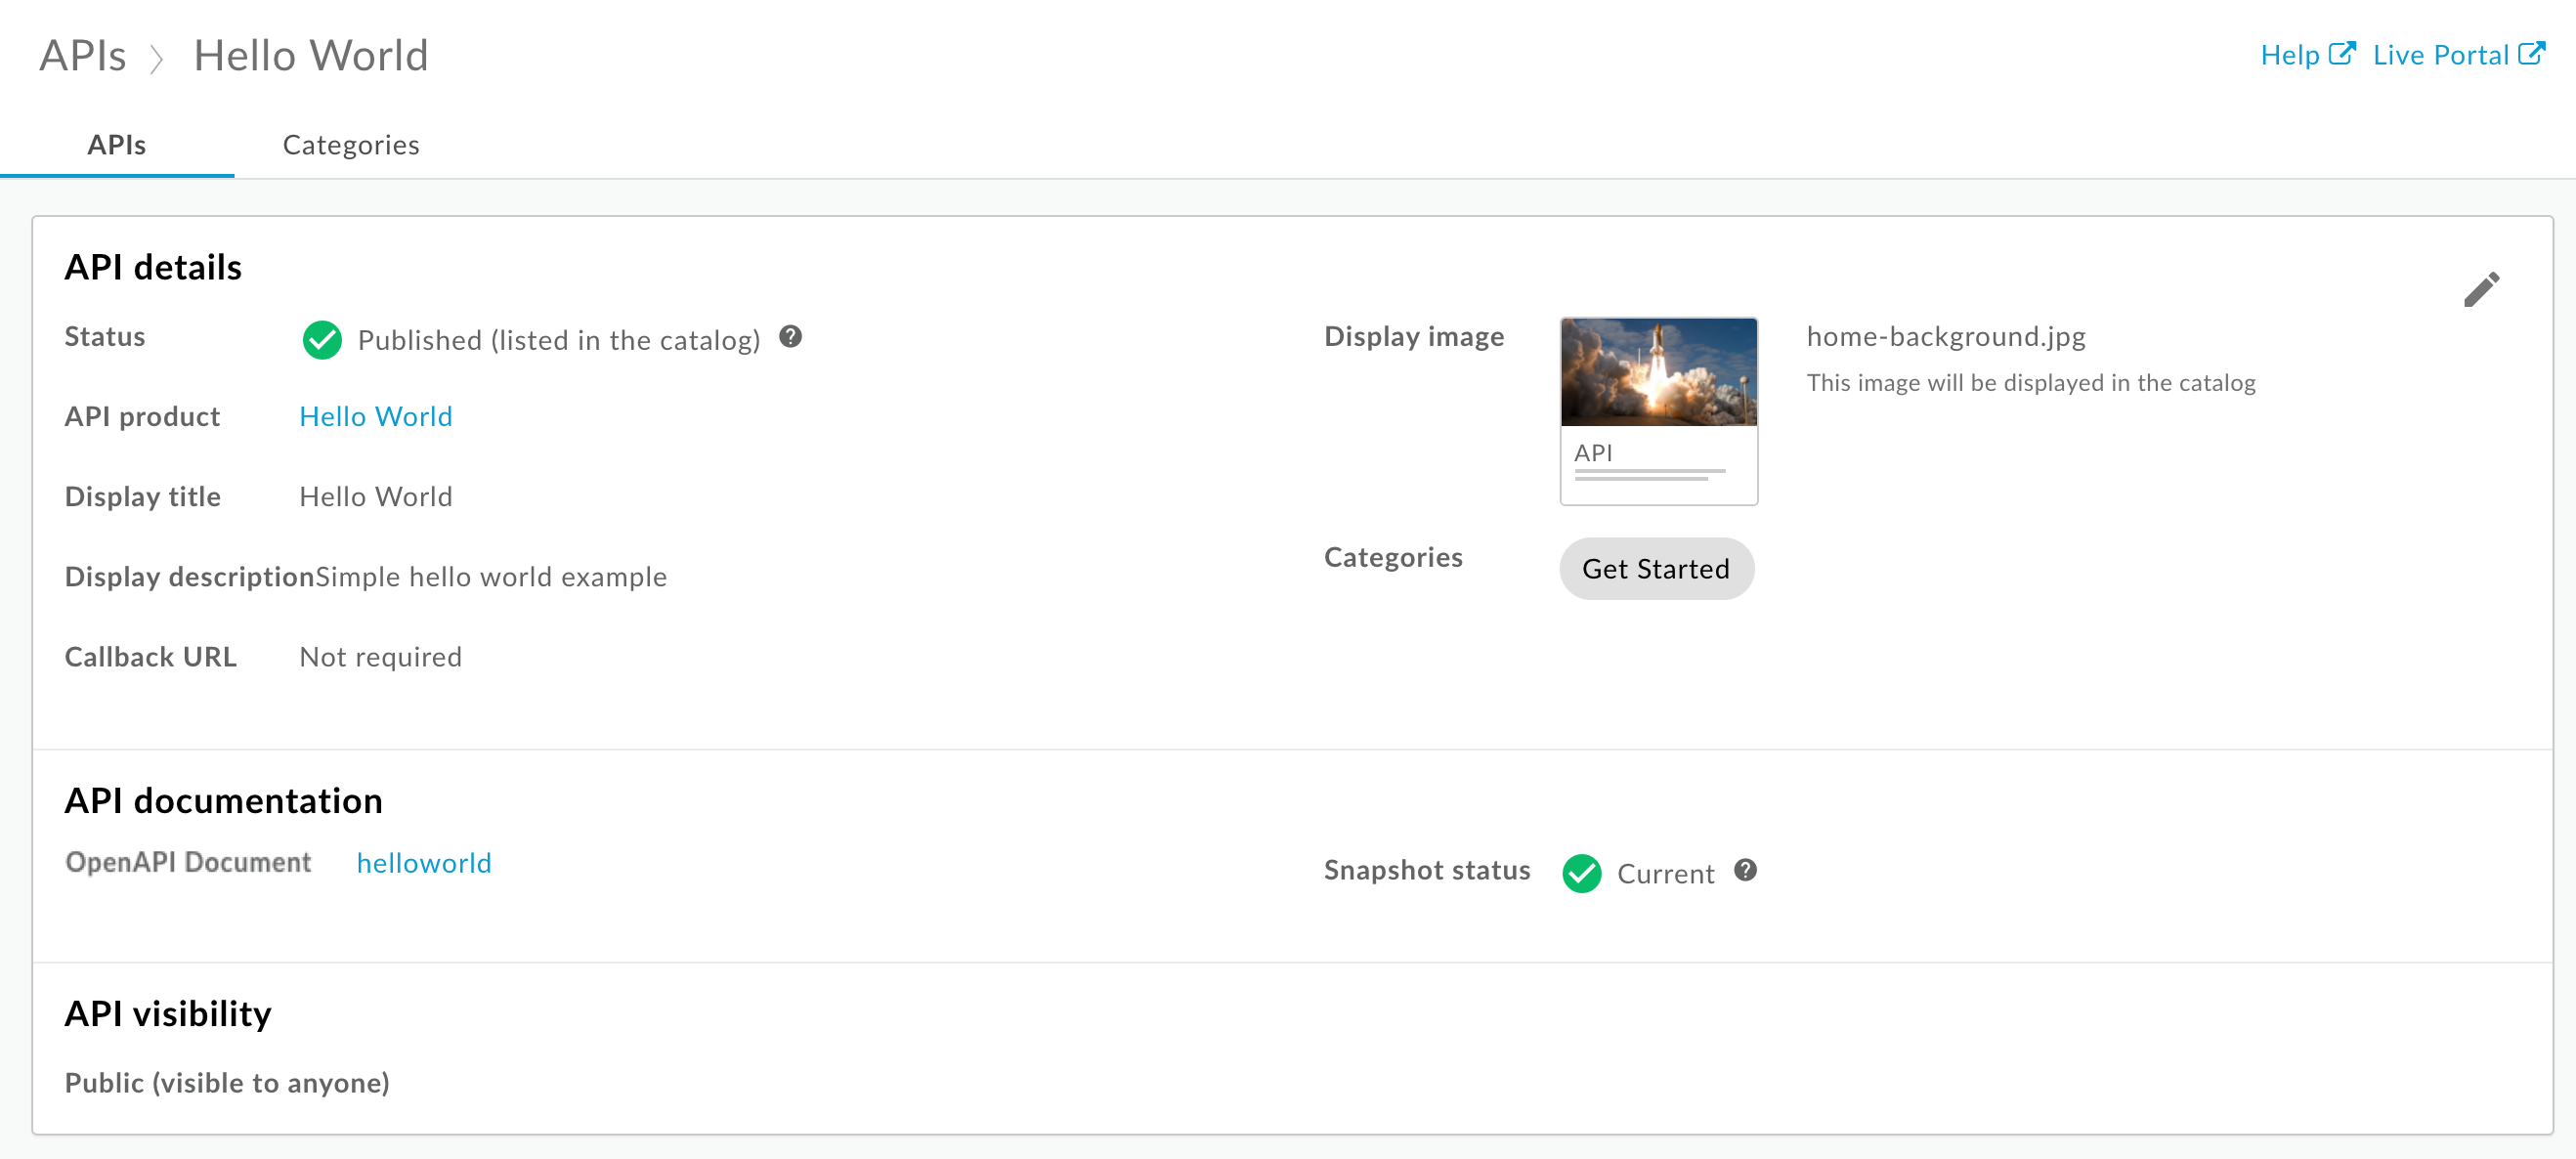
- Under API details, configure the following options:
- Select Published (listed in the catalog) to publish the API to your portal.
- For Display image:
- Click Select image.
- Click home-background.jpg from the list of existing images in the Select image dialog.
- Click Select.
- Preview the image and click Select.
- For Categories, enter Get Started and press Enter.
Leave all other values set to their defaults.
- Under API documentation, to auto-generate API reference documentation from a snapshot of your OpenAPI
Specification:
- Select OpenAPI document.
- Click Select Document.
- Select the My Specs tab (if it is not already selected).
- Select helloworld from the list of specs.
- Click Select.
-
Click Save to save the API details.
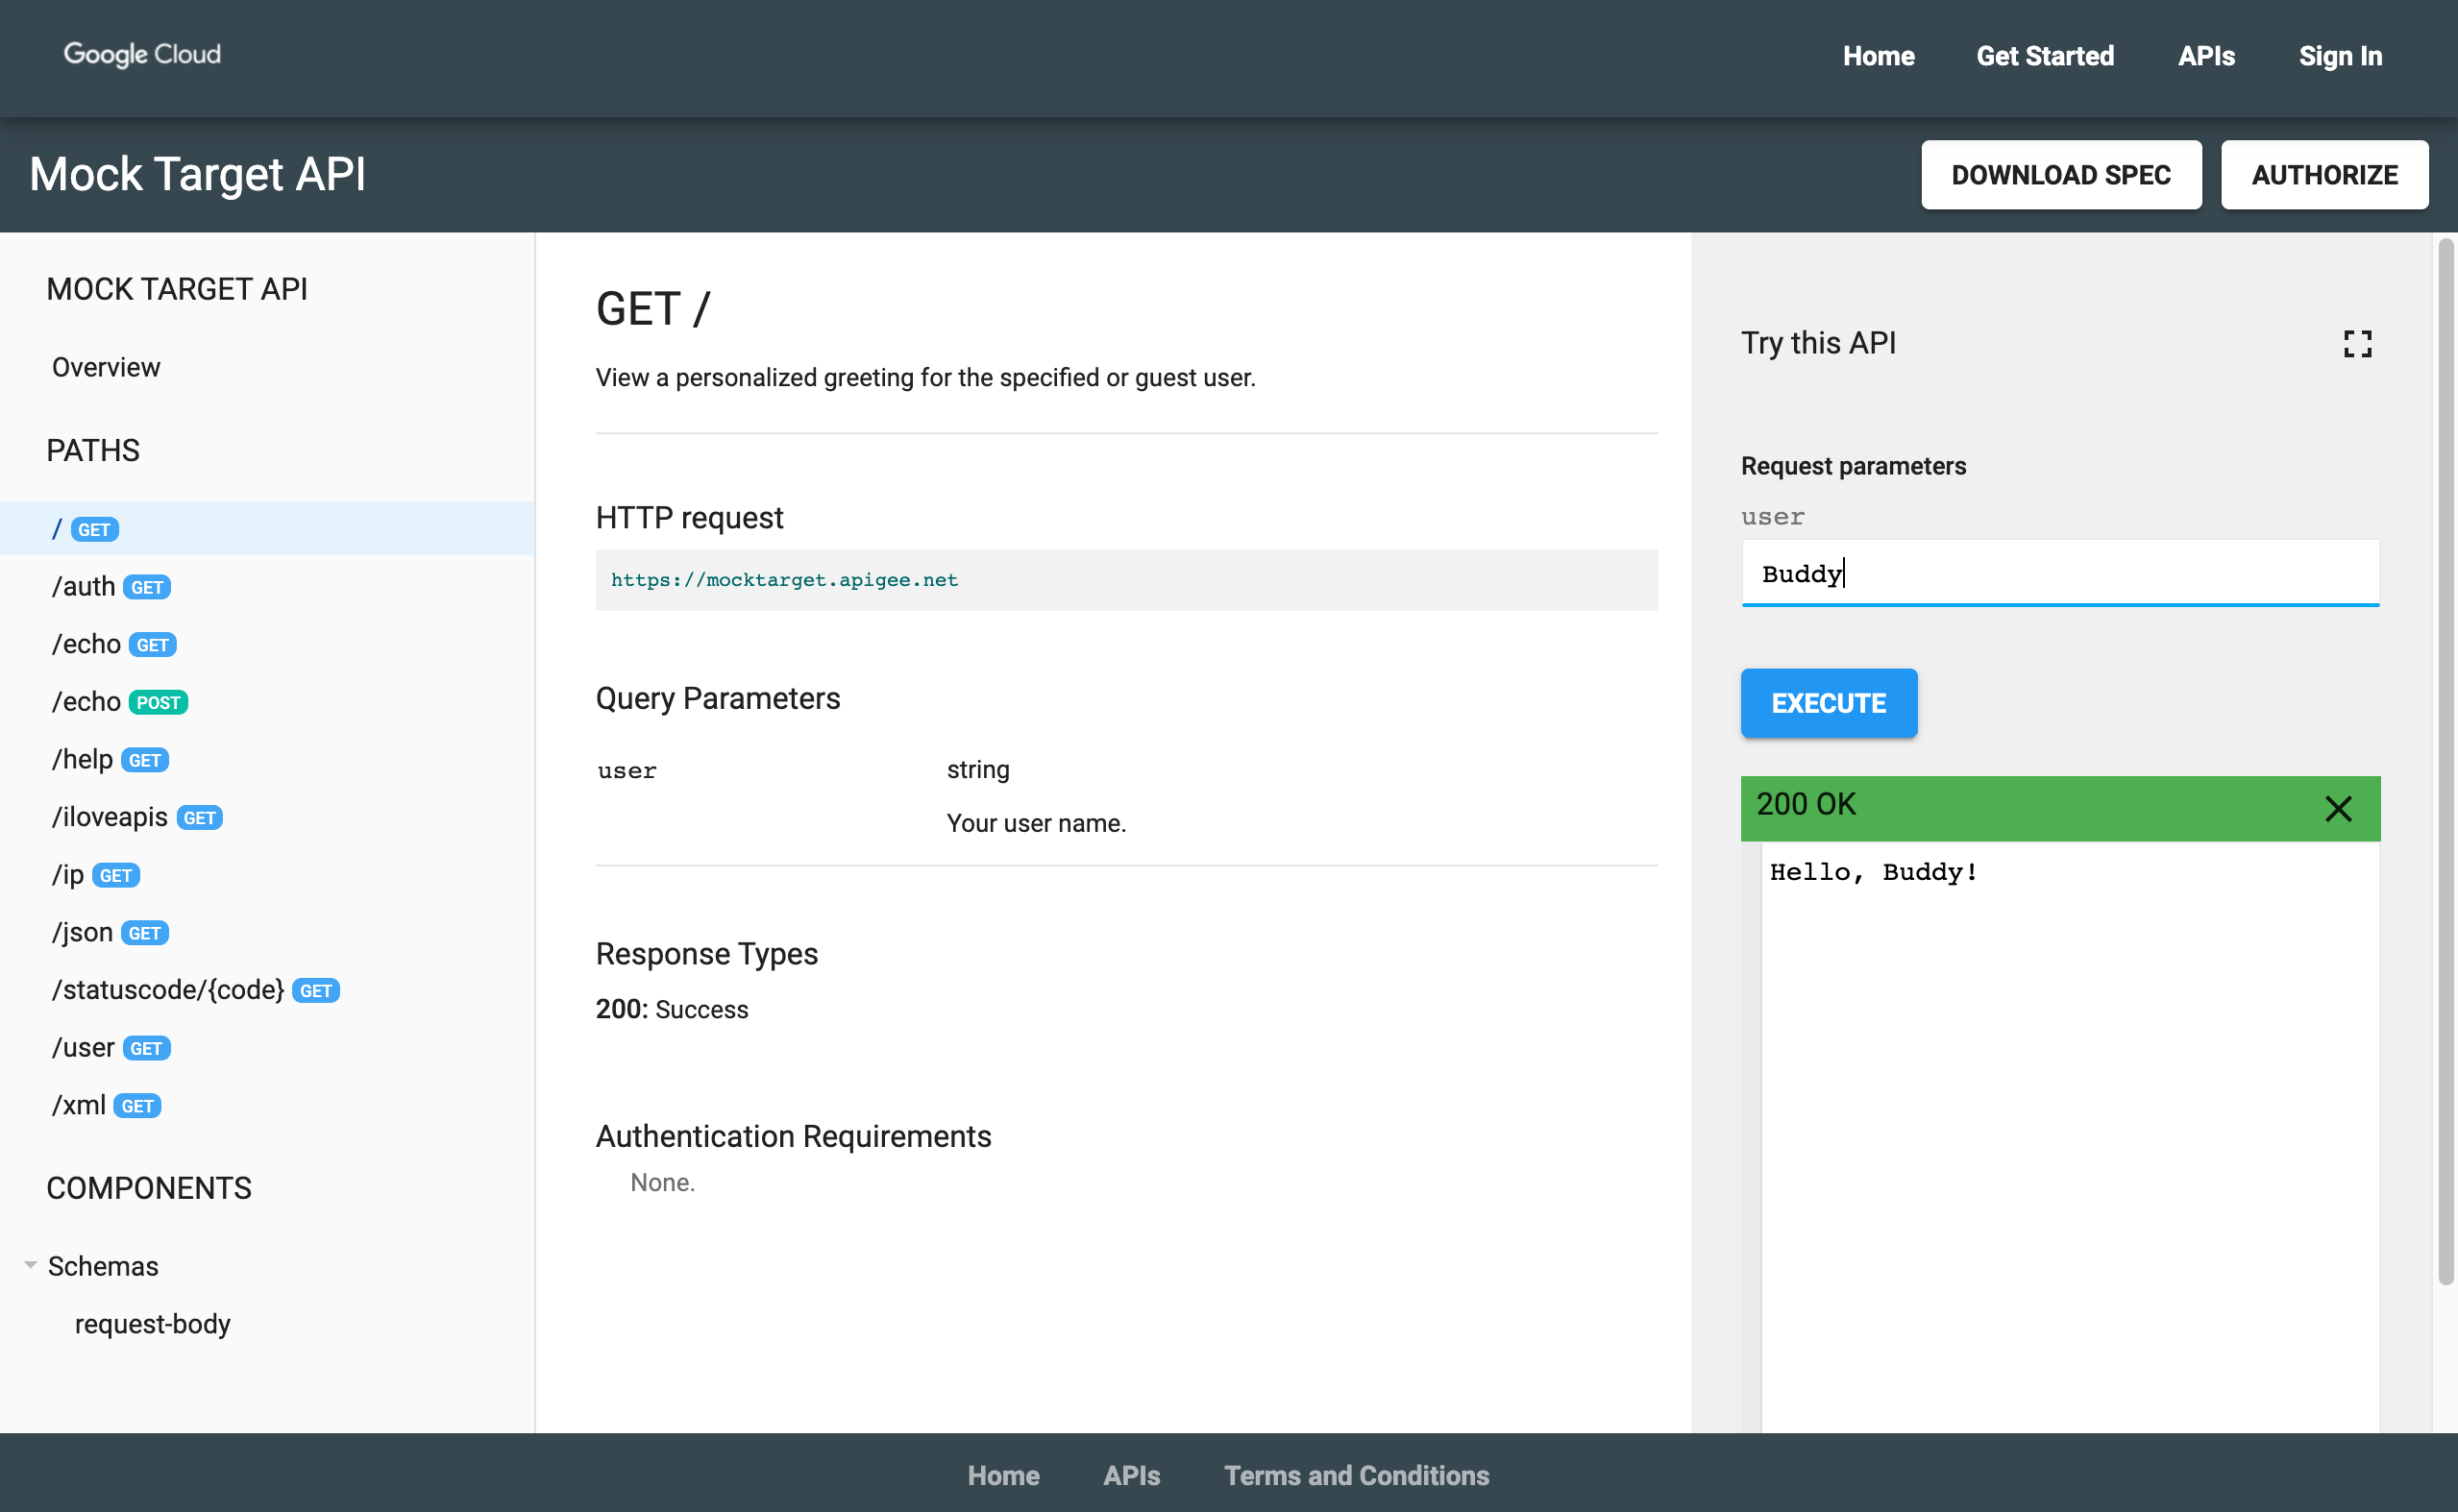
To view the API reference documentation:
- Click Live Portal to view the changes in the live portal (or refresh the live portal if it is already open in another tab).
- Click APIs in the top navigation bar to the view published API.
- Click the Hello World card to view the API reference documentation. Give your API a try!
Congratulations! You have successfully completed the tutorial. Ready to learn more? Go to the Build your integrated portal.