
You're viewing Apigee Edge documentation.
Go to the
Apigee X documentation. info
This section highlights the steps that are unique to building a portal that is based on the original version (version 1.0),
You can migrate an existing portal based on the original version to take advantage of the features offered by the new version, as described in Migrate to the new version of the portal.
When you create a new portal, it will be based on the new theme, API docs, and developer identity service.
About the sample portal
A sample portal is provided for you to use as a jump-off point. The starter pages contain demo content, based on a fictitious food carts vendor company named StreetCarts, to help inspire your own portal development as you replace the text and images with your unique content. The following shows the home page of the sample portal provided.
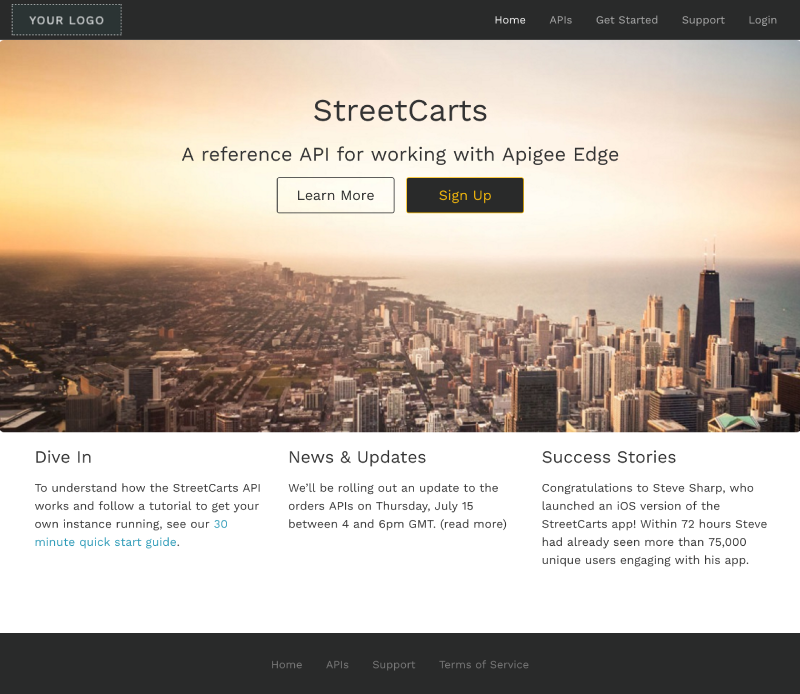
The set of starter pages provided in the sample portal are summarized below:
| Page | Description |
|---|---|
| Home | Portal home page that describes the APIs that are showcased. Serves as default home page for your portal (index.html). |
| Get Started | First page of a sample set of documentation pages that utilize a drop-down menu. |
| Set Up | Second page of a sample set of documentation pages that demonstrate use of a drop-down menu. |
| Deploy and Run | Third page of a sample set of documentation pages that demonstrate use of a drop-down menu. |
| Troubleshoot | Fourth page of a sample set of documentation pages that demonstrate use of a drop-down menu. |
| Support | Customer support FAQ and contact information. |
| Terms of Service | Sample terms of service page. |
| APIs | List of available APIs. When you generate interative API reference documentation, links to the content are added to this page automatically. See How app developers interact with your portal. Note: The contents of this page are auto-generated based on the APIs that you publish to your portal. You cannot edit the contents of this page directly; it does not appear in the pages list. You can modify the styling of the page using the theme editor. |
| My Apps | List of registered apps for an authorized user. See How app developers interact with your portal. Note: The contents of this page are auto-generated based on the registered user apps. You cannot edit the contents of the page directly; it does not appear in the pages list. You can modify the styling of the page using the theme editor |
| Login | Login page for registered users. New users can register from this page by clicking Sign up. See How app developers interact with your portal. Note: The Login page is included in your portal automatically. You cannot edit the contents of the page directly; it does not appear in the pages list. |
Quick tips for customizing the sample portal
Review the following figure to learn some quick tips for customizing the sample portal.
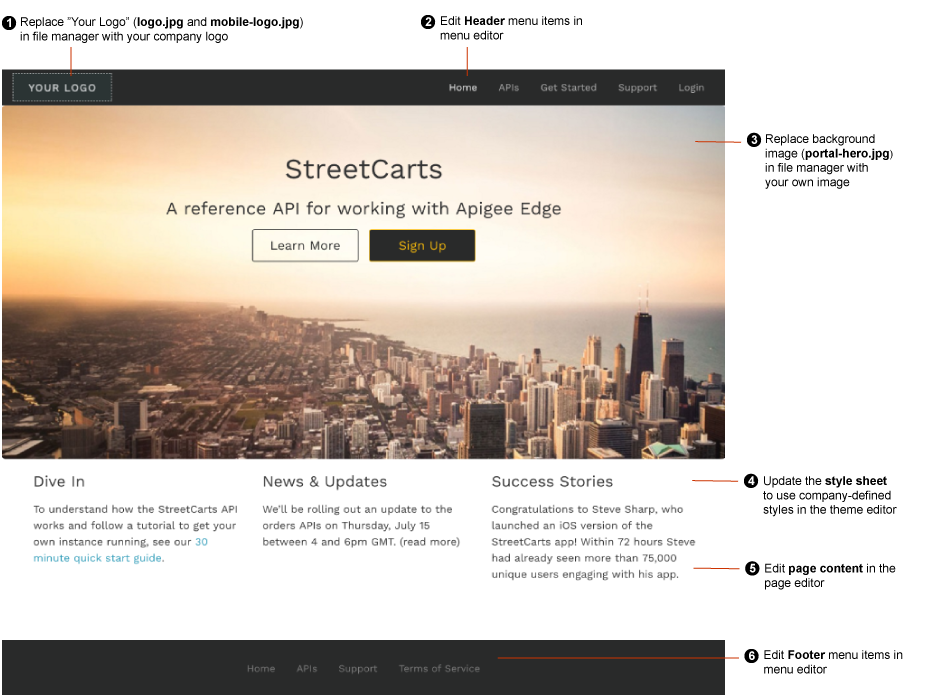
As highlighted in the previous figure, the following table summarizes the quick customizations that you can make to the sample portal.
| # | Customization | Description | More Info |
|---|---|---|---|
| 1 | Company logo | Customize the "Your Logo" image with your company's logo. Customize the CSS styles for the logo and replace the following image files in file manager by uploading your logo using the same names and relative file sizes:
|
Customize your logo |
| 2 | Header menu | Update the items in the header menu using the menu editor. | Set up navigation |
| 3 | Background image | Customize the background image on the home page. Customize the CSS styles for the background image and upload your own version of the portal-hero.jpg image in file manager using the same relative file size (1440 pixels by 540 pixels). You can modify the name of the file used in the theme. |
Customize the background image on the home page |
| 4 | Style sheet | Update the style sheet to use your own comapny styles in the theme editor. | Customize your theme |
| 5 | Portal content | Edit the content of the portal pages in the page editor. | Develop portal content using the page editor |
| 6 | Footer menu | Update the items in the footer menu using the menu editor. | Set up navigation |