
You're viewing Apigee Edge documentation.
Go to the
Apigee X documentation. info
When you create a developer portal, by default you are provided with an Apigee sample domain name for accessing your live portal in the following format:
https://orgname-portalname.apigee.io
Where orgname is the organization name and portalname is defined using the portal name converted to all lowercase and with spaces and dashes removed.
Before launching a developer portal, it is recommended that you provide your own custom domain name. For example, a popular alternative is:
https://developers.example.com
For considerations for using a custom domain with a SAML identity provider, see Use a custom domain with the SAML provider.
The following sections describe how to customize your domain.
Customize your domain name (Apigee Edge)
With Apigee Edge integrated portals, to customize your domain name perform the following steps:
- Register your domain name.
- Configure TLS.
- Add a custom domain name to your portal.
- Configure your DNS.
After you add a custom domain, you can edit or disable it. For help with troubleshooting issues, see Troubleshoot your custom domain.
Step 1: Register your domain name
If you need to register a new domain, there are many popular domain registration sites available, such as Google Domains. Which domain registration site you choose is up to you.
When deciding on your domain name, consider that user-friendly, human-readable URLs are a key component in improving search engine optimization, as described in Implement search engine optimization (SEO).
Step 2: Configure TLS
To support HTTPS, you need to configure TLS by creating keystores and aliases that contain the necessary digital certificates in the portal environment, as described in the following procedure.
To configure TLS:
- Purchase a TLS certificate from a reputable certificate authority, such as Google Trust Services. Which certificate authority you choose is up to you.
- Sign in to https://apigee.com/edge.
- Select your organization from your user profile menu.
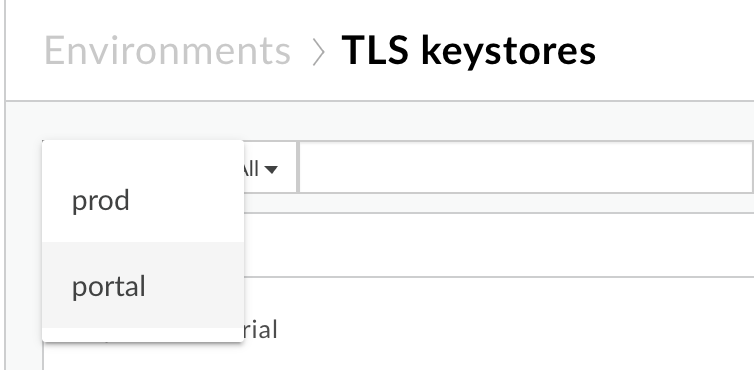
- Select Admin > Environment > TLS Keystores to display the TLS keystores page.
Select portal from the environment drop-down.
Create a keystore and alias, as described in Creating keystores and truststore using the Edge UI.
Step 3: Add a custom domain name to your portal
When you add a custom domain name to your portal, the system creates the following resources for you (using the same functionality used to apply a custom domain name to an endpoint such as api.example.com):
A virtual host, listening on port 443, using the custom domain name you specify.
An API proxy using the custom domain URL with its target endpoint set to the default portal domain. The name of the API proxy matches the custom domain name with the periods replaced by underscores. The API proxy is deployed to the portal environment.
To add a custom domain name to your portal:
- Select Publish > Portals and select your portal..
- Select Settings in the drop-down menu in the top navigation bar or on the landing page.
- Click the Domains tab.
- Under Custom Domain, complete the following fields.
After you complete all fields, the Custom Domain status icon will be updated, as follows:Field Description Keystore Select a keystore from the drop-down list. Note: The list is populated using the keystores that you have created in the portal environment in step 2.
After you select a keystore, the Alias field displays.
Alias Select a valid alias from the drop-down list. Note: The list is populated using the aliases that you have created for the selected keystore. The list does not include keystores with invalid certificate chains, Apigee domains, or truststores.
To determine when a certificate on the list will expire:
- View the icons:
 Certificate expires in more than 30 days or the selected custom domain may already be in use.
 Certificate expires within 30 days.
 Certificate has expired.
- Position your cursor over an alias to display the remaining number of days that the certificate will be valid.
After you select an alias, the Domain field displays.
Domain Select a domain from the drop-down list. If you have selected a wildcard alias, enter the subdomain. Note: The list of domains is populated using the common and alternative names for the top-level certificate in the chain defined by the selected alias.
In addition, the DNS configuration is validated and the Configure DNS status icon will be updated, as follows:Status Description 
Keystore, alias, and custom domain are valid. 
Certificate will expire within 30 days. 
Keystore, alias, and custom domain are invalid. Status Description
DNS configuration is valid.
DNS configuration is not valid. You must configure your DNS, as described in Configuring your DNS. - View the icons:
-
Click Enable (or Save if you are editing).
You can enable your custom domain even if the custom domain or DNS configuration is invalid.
Step 4: Configure your DNS
Next, you need to add a canonical name (CNAME) record to your domain DNS to point to {org_name}-portal.apigee.net.
To confirm the CNAME value:
- Select Publish > Portals and select your portal.
- Select Settings in the drop-down menu in the top navigation bar or on the landing page.
- Click the Domains tab.
- View the CNAME value for your organization in the Configure DNS section, as shown in the following figure:
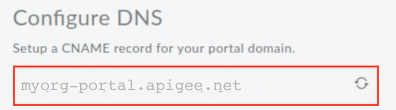
The following provides an example of the CNAME record that you would configure for the custom domain shown above (that is, for the developers.example.com custom domain in the myorg organization):
developers.example.com. CNAME myorg-portal.apigee.net.
Troubleshoot your custom domain
The following sections provide suggestions for troubleshooting your custom domain.
Troubleshoot: Verify your domain DNS setup using dig
After your domain DNS is updated to include the CNAME record, it takes time for the changes to propagate to other DNS servers world-wide. You can query your domain DNS server to verify that the CNAME record was set up correctly, even before it's fully propagated to other DNS servers, using dig.
For example, the following dig command queries your domain DNS server. In the command output, the ANSWER SECTION contains the CNAME record entry.
$ dig @your.domain.dns developer.mycompany.com
; <<>> DiG 9.8.3-P1 <<>> @your.domain.dns developer.mycompany.com
; (1 server found)
;; global options:  cmd
;; Got answer:
;; ->>HEADER<<- opcode: QUERY, status: NOERROR, id: 41356
;; flags: qr rd ra; QUERY: 1, ANSWER: 3, AUTHORITY: 0, ADDITIONAL: 0
;; WARNING: recursion requested but not available

;; QUESTION SECTION:
;developer.mycompany.com.       IN  A

;; ANSWER SECTION:
developer.mycompany.com.    29  IN  CNAME   myorg-portal.apigee.net.

;; Query time: 141 msec
;; SERVER: 192.168.1.254#53(192.168.1.254)
;; WHEN: Mon Mar 20 16:41:59 2017
;; MSG SIZE  rcvd: 136
Troubleshoot: Unable to identify proxy for host
When you add a custom domain name to your portal, an API proxy is generated by default that uses the custom domain URL with its target endpoint set to the default portal domain. If you modify or delete the API proxy that is associated with a custom domain, you will invalidate the custom domain configuration and receive a Unable to identify proxy for host error message when attempting to access the custom domain URL. For example:
{"fault":{"faultstring":"Unable to identify proxy for host: developers.mycompany.com:443 and url: \/","detail":{"errorcode":"messaging.adaptors.http.flow.ApplicationNotFound"}}}
To restore the custom domain configuration in the event that the API proxy has been modified or deleted:
- Select Publish > Portals and select your portal.
- Select Settings in the drop-down menu in the top navigation bar or on the landing page.
- Click the Domains tab.
- Click Save to restore the API proxy.
Update your certificate
For general information on updating TLS certificates, see Update a TLS certificate.
- Follow the steps in Step 2: Configure TLS.
- Follow the steps in Step 3: Add a custom domain name to your portal