
You're viewing Apigee Edge documentation.
Go to the
Apigee X documentation. info
Set up navigation to link the pages that you have developed to your portal, as described in the following sections.
Explore the Menus page
Set up and publish the navigation menus in your portal using the navigation menu editor on the Menus page.
To access the Menus page:
- Select Publish > Portals in the side navigation bar, select your portal, and click Menus on the landing page.
- When editing your portal, select Menus in the drop-down menu in the top navigation bar.
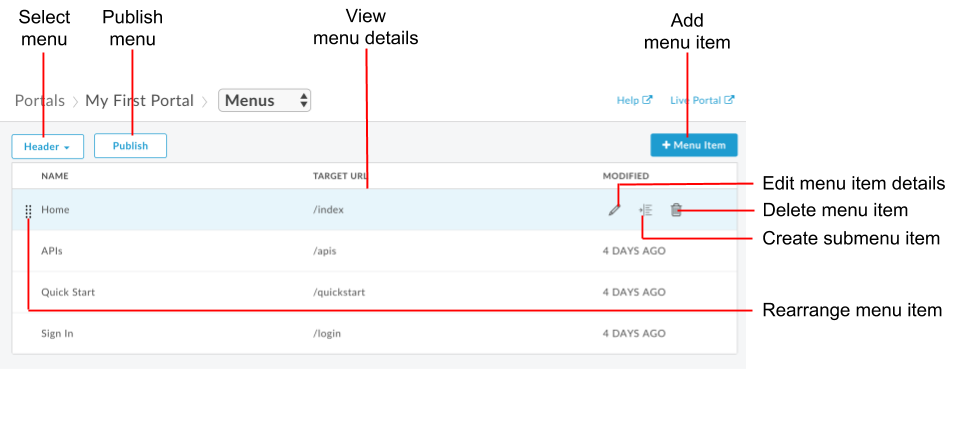
As highlighted in the previous figure, the navigation menu editor enables you to:
- Select the menu you want to edit (header or footer) and view the menu item details
- Add items to a navigation menu
- Create submenus
- Edit or delete a menu item
- Rearrange menu items
- Publish a menu
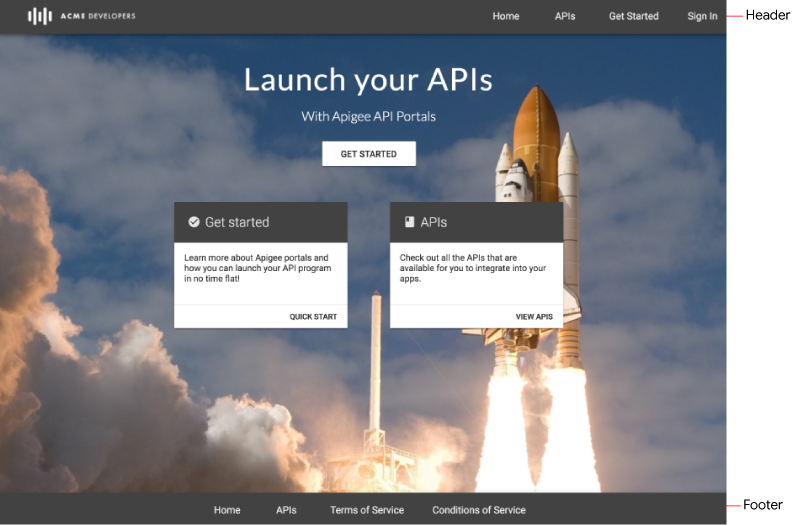
About the default navigation menus
Two navigation menus are provided by default: Header and Footer. The default navigation menus appear in and link to the set of starter pages provided, as shown in the following figure.
Add items to a navigation menu
To add an item to a navigation menu:
- Access the Menus page.
- Select the menu that you want to edit in the drop-down list (Header or Footer).
- Click + Menu Item.
In the navigation menu dialog, enter the following details:
Field Description Required? Name Name of the menu item as it will appear in the portal. This value can be different from the actual page name. Yes Page Path or URL Enter an absolute URL to an external page, an absolute or relative URL to a page in your portal, or click ... and select a page in your portal from the drop-down list. Yes Click Create.
Click Publish to publish your changes to the live portal.
Rearrange menu items
To rearrange an item in a navigation menu:
- Access the Menus page.
- Select the menu that you want to edit in the drop-down list.
- Position your cursor over the menu item that you want to move to display the actions.
- Click and hold the mouse button over
 , to the left of the menu item name.
 - Drag the menu item to its new location in the menu item list and release the mouse button.
- Click Publish to publish your changes to the live portal.
Create a submenu
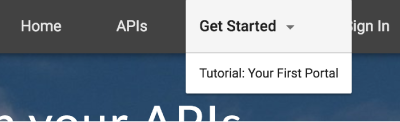
A submenu displays as a drop-down menu when you overlay the parent item.
To create a submenu:
- Access the Menus page.
- Select the menu that you want to edit in the drop-down list.
- Add a menu item that will serve as the parent menu.
- Add additional menu items that will serve as the submenus.
- Rearrange the submenu items so that they are under the parent menu in the desired order that you want them to appear in the menu.
- Position the cursor over the menu item that you want to add as a submenu and click
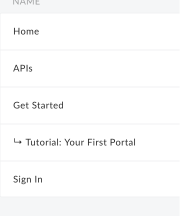
 to indent the submenu items one level under the parent menu.
The following figure shows how a submenu item appears in the menu list:
to indent the submenu items one level under the parent menu.
The following figure shows how a submenu item appears in the menu list:
- Click Publish to publish your changes to the live portal.
To move a submenu item back to the top-level menu hierarchy, click  .
.
Edit a navigation menu item
To edit an item in the navigation menu:
- Access the Menus page.
- Select the menu that you want to edit in the drop-down list.
- Position the cursor over the menu item that you want to edit and click
 .
. - Edit the menu item details.
- Click Save.
- Click Publish to publish your changes to the live portal.
Publish a navigation menu
To publish a navigation menu;
- Access the Menus page.
- Select the menu that you want to publish from the drop-down list.
- Click Publish to publish the navigation menu.
Delete an item from a navigation menu
To delete an item from a navigation menu:
- Access the Menus page.
- Select the menu that you want to edit from the drop-down list.
- Position your cursor over the menu item in the list to display the actions menu.
- Click
 .
. - Click Delete to confirm the delete operation.
- Click Publish to publish your changes to the live portal.
Customize the menu items and navigation bar
Customize the font size and style of the menu items and other aspects of the navigation bar appearance, as described in Customize the navigation bar.