You're viewing Apigee Edge documentation.
Go to the
Apigee X documentation. info
Introduction
This topic explains how to add a Node.js application to an existing proxy on your local file system and how to deploy the proxy to Apigee Edge.
Preparing your development environment
In this topic, we assume you already have a proxy development environment set up on your local system and that you want to integrate a Node.js application into it.
The basic structure of a proxy application that includes a Node.js app follows the pattern
shown in the figure below, with a base /apiproxy
folder and sub-folders for resources, targets, and proxies. The apiproxy/resources/node folder is where Node.js files must be
placed. The other folders contain XML files that define proxy and target endpoints, proxy flow,
conditional flows, and so on. For a more complete description of the API proxy structure,
see API proxy configuration reference.

Just remember that any Node.js code that is part of the proxy must be placed under /apiproxy/resources/node. That's where Edge expects to find it when it is deployed.
Specify the Node.js target with ScriptTarget
The key to integrating Node.js into a proxy is specifying the <ScriptTarget> element in the target endpoint's XML file. In the proxy file structure, this XML file is located in apiproxy/targets. By default, the filename is default.xml.
For context, consider that a target endpoint usually points to a backend service of some kind. In this case, we hit the Apigee mock target service. A target endpoint definition looks like this:
<TargetEndpoint name="default">
    <Description/>
    <Flows/>
    <PreFlow name="PreFlow">
        <Request/>
        <Response/>
    </PreFlow>
    <HTTPTargetConnection>
        <URL>http://mocktarget.apigee.net/</URL>
    </HTTPTargetConnection>
    <PostFlow name="PostFlow">
        <Request/>
        <Response/>
    </PostFlow>
</TargetEndpoint>
The <HTTPTargetConnection> element specifies the URL of the backend service, the Apigee mock target service.
However, in the case of Node.js, the Node.js application itself is the target. You specify this with <ScriptTarget> in the apiproxy/targets/default.xml file.
Instead of the target using the <HTTPTargetConnection> element to specify the URL of a backend service, the Node.js application is referenced directly using a <ScriptTarget> element, like this:
<TargetEndpoint name="default">
    <ScriptTarget>
         <ResourceURL>node://server.js</ResourceURL>
    </ScriptTarget>
    <PreFlow name="PreFlow">
        <Request/>
        <Response/>
    </PreFlow>
</TargetEndpoint>
The <ResourceURL> parameter must always be prefixed with node://,
followed by the name of the main Node.js script. And, as noted previously, Node.js resources must
reside in /apiproxy/resources/node at the API proxy scope.
You can set additional parameters in ScriptTarget. For details, see Advanced ScriptTarget configuration.
For the purpose of this example, here is the source code for the main Node.js file, called server.js. It's the basic HTTP server that returns "Hello World!" when it receives a request:
var http = require('http');
console.log('node.js application starting...');
var svr = http.createServer(function(req, resp) {
    resp.end('Hello, Node!');
});

svr.listen(process.env.PORT || 9000, function() {
    console.log('Node HTTP server is listening');
});
To summarize, assuming that the main Node.js application is implemented in a file
called server.js, and that the endpoint configurations are
both named default.xml, then the API Proxy containing the
Node.js script has the following structure:
/apiproxy/proxyName.xml
/apiproxy/proxies/default.xml
/apiproxy/targets/default.xml
/apiproxy/resources/node/server.js
Prepare to deploy the application
Most Node.js apps have dependency files and include a package.json file in the base directory. In this case, the best practice is to run the npm utility to ensure that the top-level node_modules directory is populated with the dependencies before you deploy. If there are any remote dependencies that are not included in node_modules, your Node.js application will not run on Edge.
You can easily retrieve all dependencies onto your file system using the npm utility:
- From the base directory of your Node.js application, run:
$ npm install
or
$ npm update
When the dependencies are installed, you are ready to deploy your proxy to Edge.
Deploy the Node.js app to Apigee Edge
Before you deploy, you'll need to know your organization name, user name, and password for your Apigee Edge account. You need this information to correctly form the deployment tool command.
Here's the command. It assumes (with the -d flag) that you are in the root directory of your proxy. If your proxy is called foo, then enter this command from the foo directory:
$ apigeetool deployproxy -u username -p password -o org -e test -n hellonode -d .
$ apigeetool deployproxy -h
For a quick summary:
- -n This flag lets you specify the name of the proxy that will be created when the app is deployed. You'll see this name in the management UI.
- -d Specifies the root directory of the API proxy.
- -o, -e, -u, and -p specify the organization name, deployment environment, user name and password.
Test the new API proxy
You have just added a Node.js app to an existing API proxy and deployed the proxy to Apigee Edge! To test it, run this cURL command. We assume the default base path (/) is used (base path is specified in the proxy endpoint configuration file). Be sure to substitute your organization name for org_name. If you do not have cURL installed, you can enter the URL in a browser.
$ curl http://org_name-test.apigee.net/
Hello, Node!
View the new proxy in the management UI
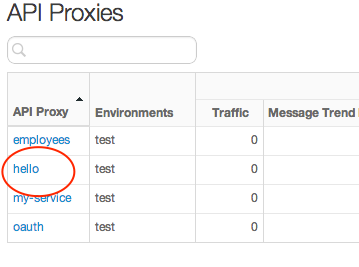
Log in to your your Apigee Edge account and go to the API Proxies page. You will see the proxy called "hellonode" listed there.

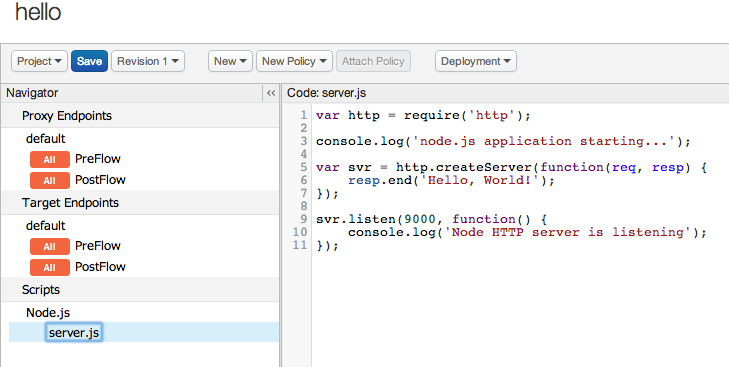
Click on "hellonode" to view details about the proxy. In the Develop view, you can see the source code you uploaded, add policies, edit flows, and so on.

Next steps
For information on debugging Node.js applications running on Apigee Edge, see Debugging and troubleshooting Node.js proxies.
