You're viewing Apigee Edge documentation.
Go to the
Apigee X documentation. info
This topic explains the simplest way to wrap a Node.js application in an API proxy using the management UI.
Introduction
Chances are, the first Node.js app you ever created was an HTTP server that responds to requests with "Hello World!" The simplest way to try out Node.js on Apigee Edge is to do something very similar. With just a few mouse clicks, you'll have a functioning, proxied Node.js HTTP server running on Edge. After that, you can use the code editor in the UI to modify the Node.js app, add additional Node.js files, add policies, and so on.
Creating the sample Hello World! API proxy
This section explains how to create an Edge API proxy that interacts with a Node.js HTTP server. The Node.js HTTP server code is already written for you and is automatically deployed to Edge when you follow these simple steps.- In the Build a Proxy wizard, select Node.js App.
- Click Next.
- Follow the Build a Proxy wizard and make the following selections.
Field Selection Details Proxy Name Enter Nodejs-Hello. The name displayed for your API.Proxy Base Path Enter nodejs-hello Source Select "Hello World" Sample. (We'll discuss the other options later in this topic.) Description Enter a description of the API. Security Pass through (none) Select Pass through (none). Creates a simple pass through proxy. Virtual Hosts default, secure Do not change the defaults. To learn about virtual hosts, see About virtual hosts (Beta). Build Deploy Environments Select test. - Click Build and Deploy
In response, you should see an acknowledgment that your new API proxy was successfully created and deployed in the 'test' environment. - Click View the <proxy name> proxy in the editor to display the details page for the API proxy.
Invoking the hello proxy
When you call thehello
proxy, the Node.js application executes automatically, responding with "Hello, World!". Note that
unless you specified otherwise, the Node.js application is deployed to the environment called
test. Here's the basic call using Curl (substitute your
organization name for myorg).
$ curl http://myorg-test.apigee.net/nodejs-hello
Hello, World!
Viewing and editing the Node.js code
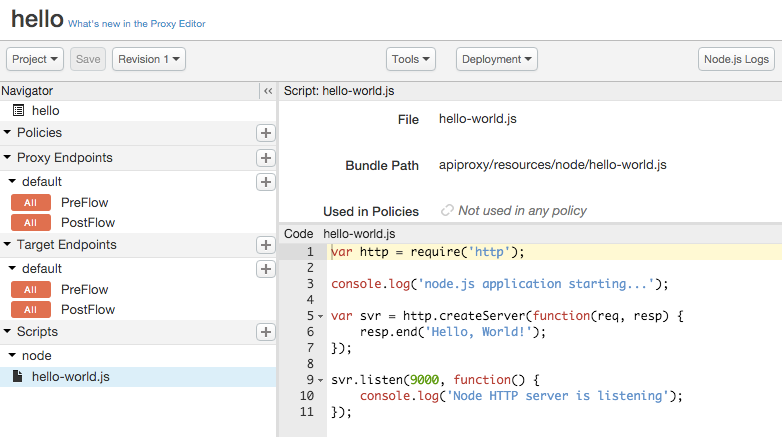
Let's look at the Node.js code that was added to the API proxy. Go to the summary page for the Hello World proxy and click Develop.

This opens the Develop view which includes a code editor. You can edit the code there
directly.

For example, change the response from Hello, World! to something else, like
Hello, Node!, then click Save. The proxy is
saved and redeployed.
Finally, re-invoke the proxy to verify the change:
$ curl http://myorg-test.apigee.net/nodejs-hello
Hello, Node!
More about running Node.js applications on Apigee Edge
Like all Node.js applications, Node.js applications running on Apigee Edge run in a single thread of control. There is no need (and in fact no ability) to start another thread, or synchronize variables between threads. Since Node.js enforces non-blocking programming, a single script can support thousands of concurrent requests because the script gives up the CPU whenever it has to wait for something, and it is notified later when it happens.
To use Node.js on Apigee Edge, you need to specify a main Node.js script file. This script
must be configured to handle incoming requests, which you typically do by using
the http or https modules, creating a client, and
so on. (If the main script is not configured this way, it will simply execute and exit after it
is deployed.) Within Apigee Edge, each Node.js application script is started from the beginning
when the proxy is deployed, and stopped when the proxy is undeployed. In between it will wait for
new requests and process them. For more information, see "Invoking an imported Node.js file" in
Deploying a standalone
Node.js app.
Next Steps
You can also create and deploy standalone Node.js applications directly from your file system.
The next topic, Deploying a
standalone Node.js app, explains how to use the apigeetool command to deploy a
Node.js app from the command line.
