
You're viewing Apigee Edge documentation.
Go to the
Apigee X documentation. info
When developing an API proxy, you can add support for an extension by adding an ExtensionCallout policy to the proxy. (If you want help creating a simple proxy, see the Build your first proxy.)
When you add support for an extension, you're associating the ExtensionCallout policy with a configured extension. That extension configuration's settings define how the extension interacts with the backend resource it's connecting to. It's this specifically-configured extension that the ExtensionCallout policy integrates into the API proxy.
To add an extension to your API proxy:
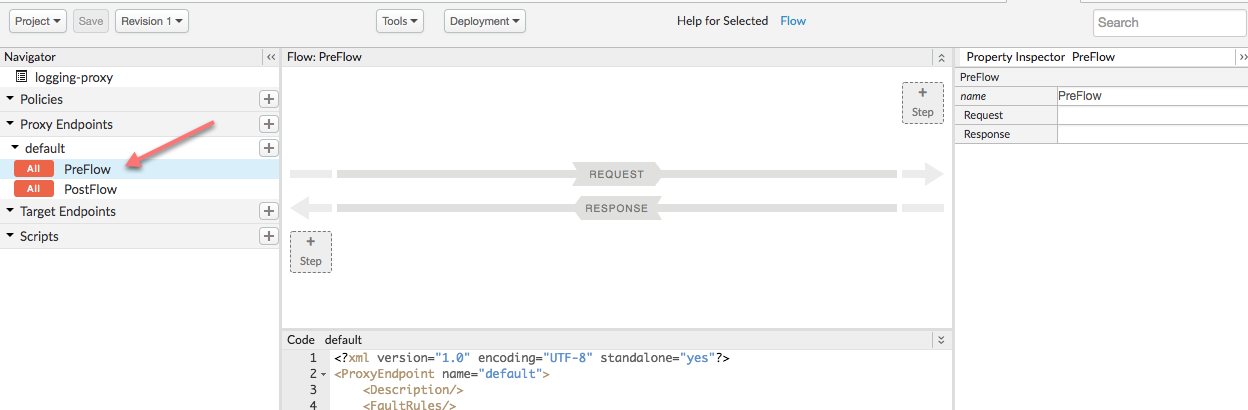
- Open your API proxy in the Apigee Edge console, in the Develop view.
While you have to be an organization administrator to create an extension, any user role can add the extension to an API proxy.
- In the Navigator pane, select the PreFlow.
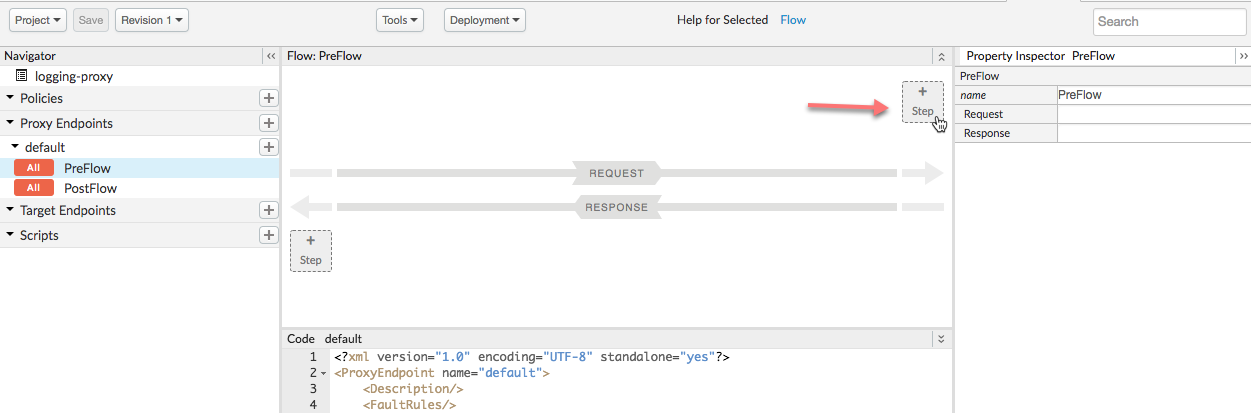
- In the upper right corner, click the + Step button to add a policy.
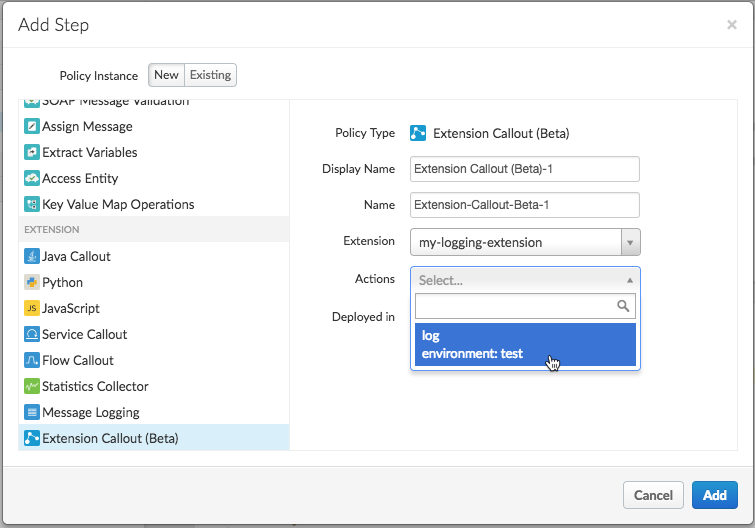
- In the Add Step dialog, in the policy list at the left side, click
Extension Callout.
If you don't see the ExtensionCallout policy in the list, be sure you're using the new Edge UI. In addition, Apigee Extensions is currently available to Apigee Edge Cloud Enterprise customers only.
- In the right pane, select options to configure the policy:
Field Description Display Name Enter the policy's display name. Name Enter the name to use for the policy programmatically. This must be unique in the proxy. Extension Choose the extension to use. This is the extension you configured earlier. Actions Select the "log" action. - Click Add.
- In the flow view, click the policy to view its configuration XML.
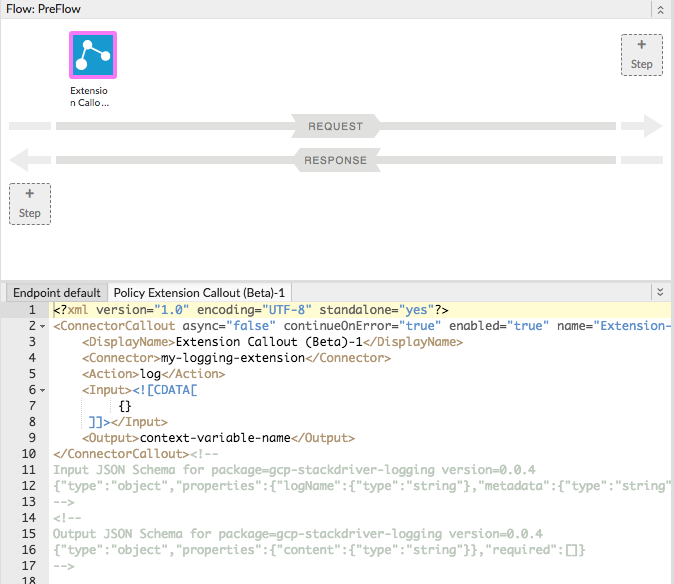
When you add the extension, you'll get example policy XML. Note that it includes schema describing how to structure configuration for the
<Input>element. (You can ignore the<Output>element schema -- there's no response body returned by the extension "log" action.) - Edit your policy XML so that it looks like the following:
<?xml version="1.0" encoding="UTF-8" standalone="yes"?>
<ConnectorCallout async="false" continueOnError="true" enabled="true" name="Extension-Callout-Beta-1">
  <DisplayName>Logging Extension</DisplayName>
  <Connector>my-logging-extension</Connector>
  <Action>log</Action>
  <Input>{
    "logName": "example-log",
    "metadata": {
      "resource": {
        "type": "global",
        "labels": {
          "project_id": "my-gcp-project"
        }
      }
    },
    "message": "This is a test"
  }</Input>
</ConnectorCallout><!--
Input JSON Schema for package=gcp-stackdriver-logging version=0.0.4
{"type":"object","properties":{"logName":{"type":"string"},"metadata":{"type":"string"},"message":{"type":"string"}},"required":["logName","message"]}
-->
<!--
Output JSON Schema for package=gcp-stackdriver-logging version=0.0.4
{"type":"object","properties":{"content":{"type":"string"}},"required":[]}
-->
Here, the
<Input>defines the following:logNameis the name of the log to write to. If this doesn't exist, it will be created by the extension.metadataspecifies information you can use to browse for the log in the Stackdriver console.messageis simply the log message you want to write.
- Click the Save button.