ステップ 4: プロキシをデプロイする
前のステップで、API プロキシに ExtensionCallout ポリシーを追加しました。次は、プロキシをデプロイしてテストできるようにします。
プロキシをデプロイするには:
- [Deployment] プルダウンをクリックして、API プロキシを「test」環境にデプロイします。
- [Trace] タブをクリックします。
- [Trace] タブで、[Start Trace Session] をクリックします。
- プロキシ URL の横にある [Send] をクリックして、API プロキシにリクエストを送信します。
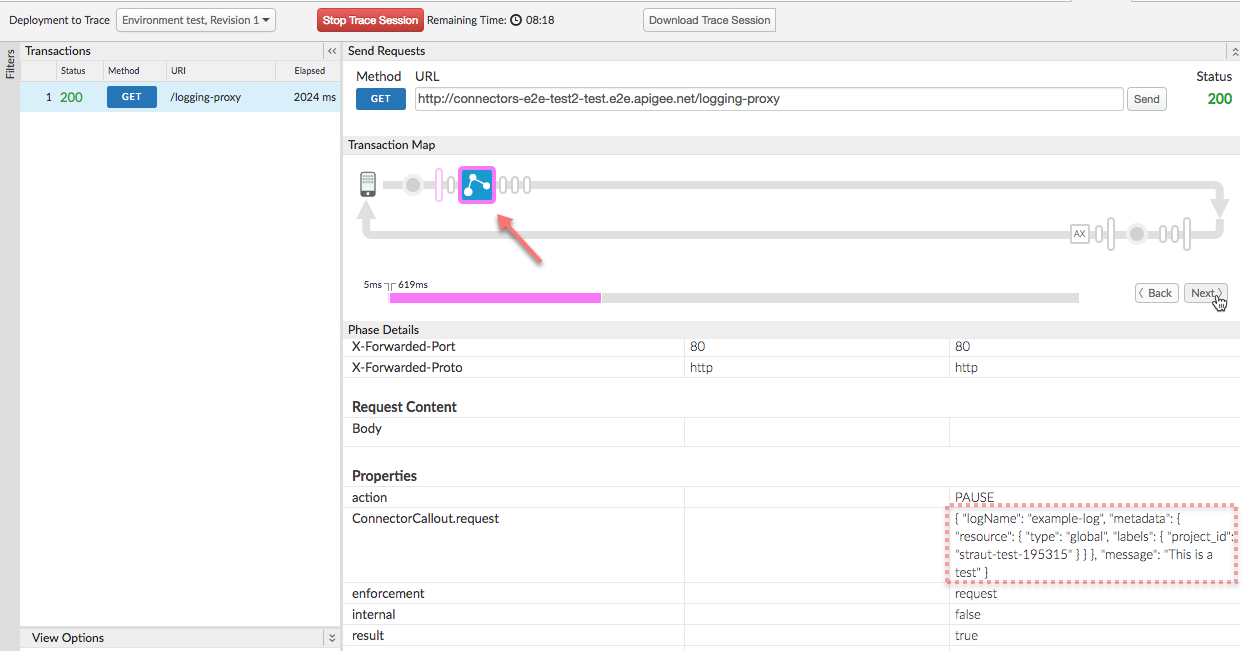
- テストが成功して、プロキシから 200 が返されたことを確認します。
- [Trace] で、ExtensionCallout ポリシーの実行ステップまで移動します。
- [Phase Details] で
ConnectorCallout.request プロパティを見つけて、その値が <Input> 要素の内容であることを確認します。
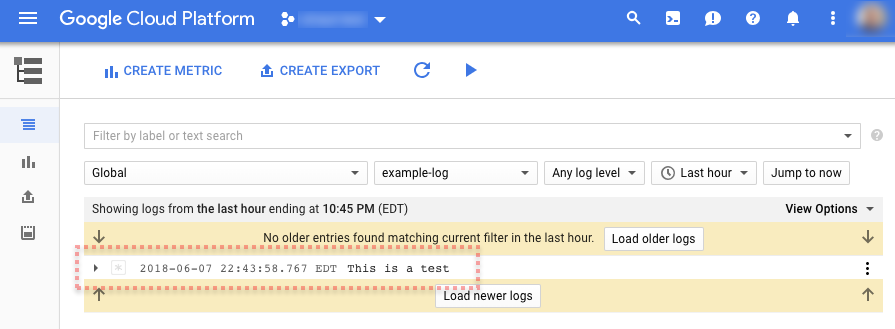
- GCP Console を開き、GCP プロジェクトに移動します。
- メインのナビゲーション メニューから、[Stackdriver] > [Logging] > [ログ] を選択します。
- ログページの左側にある [リソース] プルダウンを選択し、[グローバル] をクリックします。
- 右側にあるログのプルダウンから [example-log] を選択します。
- 次の例に示すように、ログリストにログエントリが表示されます。
次のステップ
ステップ 1
ステップ 2
ステップ 3
ステップ 4
ステップ 5: メッセージ フロー変数をログに記録する
特に記載のない限り、このページのコンテンツはクリエイティブ・コモンズの表示 4.0 ライセンスにより使用許諾されます。コードサンプルは Apache 2.0 ライセンスにより使用許諾されます。詳しくは、Google Developers サイトのポリシーをご覧ください。Java は Oracle および関連会社の登録商標です。
最終更新日 2020-07-09 UTC。
[[["わかりやすい","easyToUnderstand","thumb-up"],["問題の解決に役立った","solvedMyProblem","thumb-up"],["その他","otherUp","thumb-up"]],[["必要な情報がない","missingTheInformationINeed","thumb-down"],["複雑すぎる / 手順が多すぎる","tooComplicatedTooManySteps","thumb-down"],["最新ではない","outOfDate","thumb-down"],["翻訳に関する問題","translationIssue","thumb-down"],["サンプル / コードに問題がある","samplesCodeIssue","thumb-down"],["その他","otherDown","thumb-down"]],["最終更新日 2020-07-09 UTC。"],[],[]]
